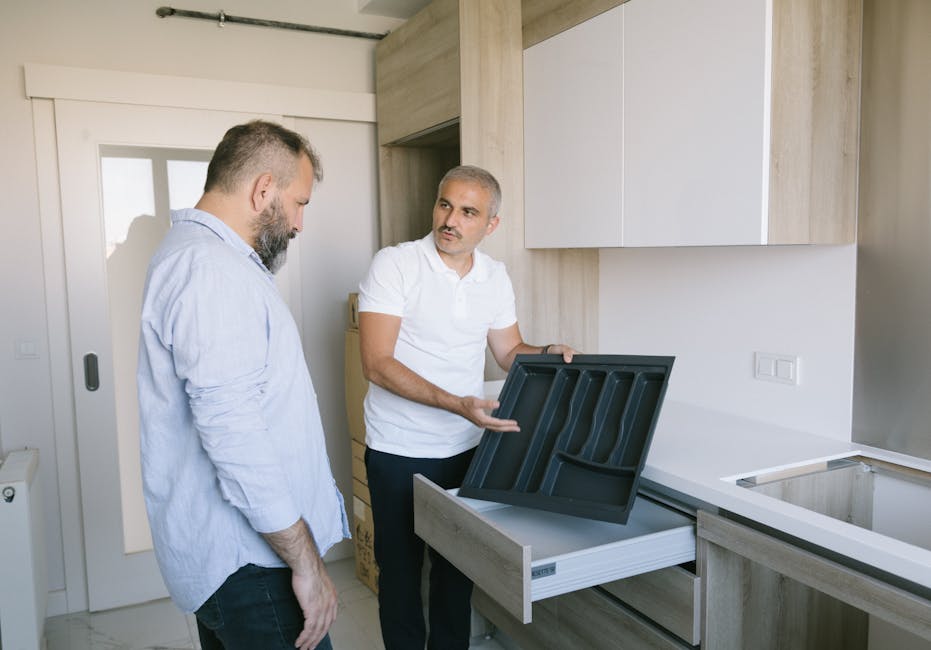

Are you ready to give your kitchen a quick and stylish upgrade? Installing drawer pulls on your kitchen cabinets is one of the easiest ways to refresh the look of your space without spending a fortune.
But if you’ve never done it before, the process might seem a bit tricky. Don’t worry—you’re about to learn simple steps that will make this task straightforward and even enjoyable. By the end of this guide, you’ll know exactly how to choose, measure, and install drawer pulls like a pro.
Let’s get started and transform your kitchen cabinets with confidence!
Tools And Materials Needed
Installing drawer pulls on your kitchen cabinets is a straightforward task, but having the right tools and materials makes all the difference. Being prepared can save you time and frustration, ensuring a smooth and precise installation. Let’s break down what you need before you start.
Essential Tools
To install drawer pulls accurately, you’ll need a few basic tools that you might already have at home. A power drill or a manual screwdriver is crucial for securing the screws tightly. A measuring tape helps you position the pulls evenly across all drawers, preventing a crooked look.
Also, keep a pencil handy to mark the exact spots for drilling. A level is helpful if you want to double-check your alignment, especially with longer handles. Don’t forget a drill bit that matches the size of the screws included with your pulls to avoid splitting the wood.
Choosing Drawer Pulls
Picking the right drawer pulls is more than just style; it affects how you use your cabinets daily. Think about the size and shape that fits your hand comfortably and complements your kitchen’s design. Are you going for a modern stainless steel look or a rustic bronze finish?
Check the screw hole spacing on the pulls to match your cabinet’s existing holes, or be ready to drill new ones precisely. If you’re upgrading, consider pulls with a finish that resists fingerprints and grime for easier cleaning. Your choice here impacts both function and aesthetics.
Additional Supplies
Besides the main tools and pulls, having some extra supplies can improve your installation experience. Keep a small container or magnetic tray nearby to hold screws and avoid losing them. Sandpaper can smooth out any rough edges around the holes after drilling.
Wood filler comes in handy if you need to fill old holes before making new ones, ensuring a clean look. Lastly, a damp cloth helps wipe away dust and debris after drilling. These small extras can make your project feel more professional and less stressful.
Preparing The Cabinets
Preparing your kitchen cabinets before installing new drawer pulls is a key step that sets the tone for a smooth and successful update. Taking the time to properly prepare ensures the new hardware fits perfectly and looks professional. Let’s focus on three essential tasks: removing old hardware, cleaning the surface, and measuring and marking.
Removing Old Hardware
Start by carefully unscrewing the existing drawer pulls. Use a screwdriver that fits the screws snugly to avoid stripping them. If the screws feel stuck, try applying a little penetrating oil and wait a few minutes before attempting again.
Keep the screws and old pulls aside if you want to reuse or recycle them. Removing hardware gently prevents damage to the cabinet surface, which saves you from patching later. Have you ever rushed this step and ended up with chipped paint or scratched wood?
Cleaning The Surface
Once the old hardware is off, clean the drawer fronts thoroughly. Use a mild cleaner or a mix of water and dish soap to remove grease, dirt, and dust. A clean surface helps the new hardware adhere better and prevents any grime from showing around the pulls.
Dry the area completely before moving on. Skipping this step might cause the screws to loosen over time due to residue or moisture. Have you noticed how even small bits of dirt can make your new pulls look crooked or dull?
Measuring And Marking
Accurate measurement is crucial for aligning your new pulls evenly. Measure the distance between existing holes if you are replacing hardware with the same size, or decide where new holes will go if the pulls differ. Use a ruler or tape measure and mark the spots lightly with a pencil.
Double-check your marks by holding the pull against the drawer to visualize placement. Marking guides the drill and keeps your pulls straight and symmetrical. What’s your strategy for ensuring every drawer pull lines up perfectly?
Marking The Drill Holes
Marking the drill holes accurately is a crucial step in installing drawer pulls on kitchen cabinets. If the holes are off even slightly, your pulls won’t line up correctly, and the whole look can feel off. Taking your time here saves you from frustrating mistakes and gives your kitchen a professional finish.
Finding The Center
Start by measuring the width of your drawer front. Divide that number by two to find the exact center point. Mark this spot lightly with a pencil.
Next, measure the height of the drawer front. Depending on the style of your pull, you’ll either place the holes centered vertically or at a specific distance from the top or bottom edge. Mark this spot clearly to ensure consistent placement.
Using A Template
Templates are a lifesaver for marking drill holes quickly and accurately. You can buy one or make your own from cardboard or scrap wood. Align the template with your center mark, then trace the hole positions onto the drawer.
Templates help maintain uniform spacing across multiple drawers, making your pulls look balanced and professional. They also save you from measuring each drawer individually, cutting down on errors.
Double-checking Measurements
Before grabbing your drill, check your marks twice. Measure the distance between holes on your pull and compare it with the marks on the drawer. Are they perfectly aligned?
Look at your marks from different angles and use a level if needed. This last check can prevent costly mistakes and keep your project running smoothly. Have you ever drilled holes only to realize the pull was crooked? Avoid that frustration here.
Drilling The Holes
Drilling the holes for drawer pulls is a key step in installing kitchen cabinet hardware. Precise drilling ensures the pulls fit perfectly and look great. Taking care during this process prevents damage to your cabinets and saves time.
Selecting The Right Drill Bit
Choose a drill bit that matches the screw size of your drawer pulls. Usually, a 3/16-inch or 1/8-inch bit works well. Use a bit designed for wood to get clean, smooth holes. Avoid bits that are too large or too small to prevent loose or tight fittings.
Drilling Carefully
Mark the exact spots for the holes on your drawer front. Use a measuring tape and pencil for accuracy. Hold the drill steady and drill straight into the marked spot. Drill slowly to maintain control and avoid slipping. Stop once the bit passes through the wood.
Preventing Damage
Place a piece of scrap wood behind the drawer front to avoid splintering. Drill at low speed to reduce heat and protect the finish. Avoid pressing too hard; let the drill bit do the work. Clean the holes with sandpaper if edges are rough. This keeps the cabinet looking neat and professional.
Installing The Drawer Pulls
Installing drawer pulls on kitchen cabinets is a simple task that boosts your kitchen’s look instantly. It requires careful alignment and secure attachment to avoid loose or crooked pulls. This section guides you through the process of fitting drawer pulls with ease and precision.
Aligning The Pulls
Place the drawer pull on the cabinet front. Use a ruler or measuring tape to find the center point. Mark the screw holes with a pencil. Make sure both marks are even and level. Double-check the alignment before drilling holes.
Inserting Screws
Drill small pilot holes on the pencil marks. This prevents the wood from splitting. Insert screws through the back of the drawer face. Hold the drawer pull steady from the front. Push screws gently until they come through the holes.
Tightening Securely
Use a screwdriver to tighten the screws. Turn slowly to avoid stripping the screws. Tighten until the pull feels firm but not overly tight. Check the pull for any wobble. Adjust screws if necessary for a perfect fit.
Final Adjustments And Tips
Check that all drawer pulls are tight and aligned properly. Test each pull to ensure smooth use and adjust screws if needed. Clean any marks or dust for a neat finish.
Final adjustments are the cherry on top of your kitchen cabinet makeover. Once you’ve installed your drawer pulls, it’s crucial to ensure everything looks perfect and functions smoothly. This is where patience and a keen eye come into play.Checking Alignment
To achieve a professional finish, start by double-checking the alignment of your drawer pulls. Use a level to ensure they’re perfectly horizontal or vertical as desired. Misalignment can make even the most expensive hardware look cheap, so take a moment to adjust any pulls that seem off. A simple trick is to step back and look at the cabinets from a distance. This perspective can reveal alignment issues that are not visible up close. If needed, slightly loosen the screws, adjust, and retighten until the pulls are perfectly aligned.Handling Common Issues
Encountering issues during installation is common, but most can be easily resolved. If a screw won’t tighten properly, check if it’s the right size for the pull. Sometimes, a slightly longer screw can make all the difference. If you notice that a pull doesn’t sit flush against the cabinet, inspect the surface for uneven spots. A gentle sanding can smooth out any bumps. Have you ever thought about how small issues can be easily fixed with the right tools? Keep a basic toolkit handy for such occasions.Maintaining Hardware
Once installed, regular maintenance will ensure your drawer pulls stay in top condition. Wipe them down with a damp cloth to remove fingerprints and grime. Avoid harsh chemicals that can tarnish or damage the finish. Consider using a soft toothbrush to clean intricate designs. This can prevent dust buildup and keep your pulls looking new. How often do you check your kitchen hardware for wear and tear? Regular checks can prevent long-term damage and keep your kitchen looking pristine.Frequently Asked Questions
How Do I Measure For Drawer Pulls On Cabinets?
Measure the distance between the screw holes on the pull. Mark the same distance on the drawer front. Use a ruler and pencil for accuracy before drilling holes.
What Tools Are Needed To Install Drawer Pulls?
You need a drill, drill bits, screwdriver, measuring tape, pencil, and level. These tools ensure precise placement and secure installation of drawer pulls.
How Do I Align Drawer Pulls Evenly?
Use a level and measuring tape to mark equal distances from edges. Double-check measurements before drilling to ensure pulls are perfectly aligned and balanced.
Can I Install Drawer Pulls Without Drilling?
Yes, some drawer pulls use adhesive backing. However, adhesive may not be as durable as screws for heavy use.
Conclusion
Installing drawer pulls on kitchen cabinets is simple and quick. Measure carefully to place each pull in the right spot. Use a drill to make holes with precision. Tighten screws firmly to keep pulls secure. Choose handles that match your kitchen style.
Small changes can make your kitchen look fresh. Enjoy the new look and easy opening of drawers. This task saves money and adds a personal touch. Try it yourself and see the difference today!

Sophie Hartwell is the founder of KitchenQuik.com, where she shares kitchen tips, smart cooking hacks, and the best product picks to make everyday cooking easier and more enjoyable.


