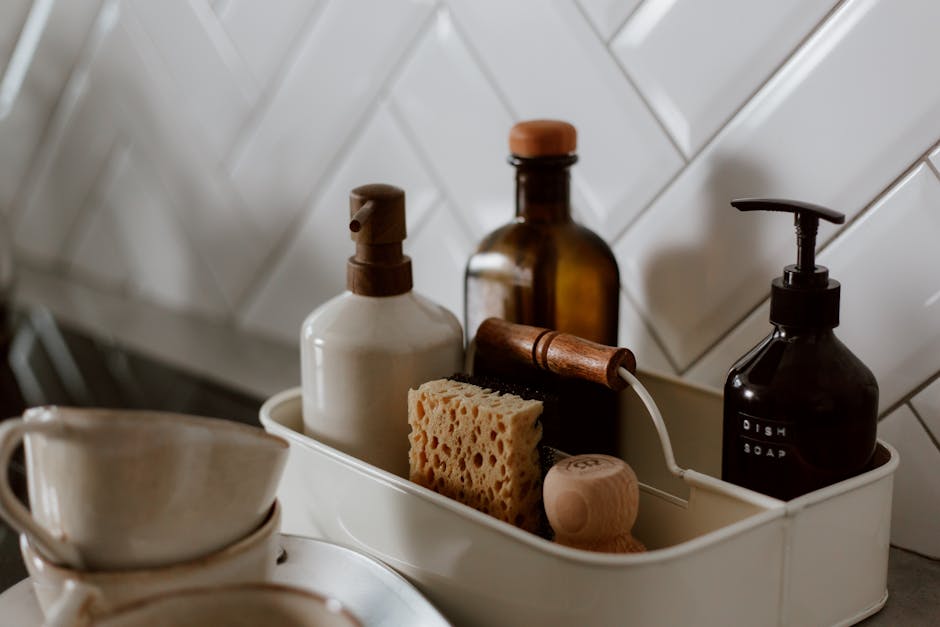
Installing a soap dispenser on your kitchen sink can make your daily routine easier and keep your countertop looking neat. If you’ve ever struggled with bulky soap bottles or messy spills, this simple upgrade is just what you need.
In this guide, you’ll learn easy steps to install a soap dispenser yourself—no special skills required. By the end, you’ll enjoy a cleaner, more organized kitchen space. Ready to get started? Let’s dive in!
Tools And Materials Needed
Before installing a soap dispenser on your kitchen sink, gather all necessary tools and materials. Having everything ready makes the installation smooth and fast. This list covers basic items anyone can find at home or a local store.
Tools Required
- Adjustable wrench for tightening nuts
- Phillips screwdriver to secure screws
- Drill with a drill bit for creating sink holes
- Measuring tape to check dimensions
- Plumber’s putty to seal openings
- Utility knife for trimming excess parts
- Bucket or towel to catch water spills
Materials Needed
- Soap dispenser kit including pump and bottle
- Flexible hose to connect dispenser to water supply
- Mounting hardware, usually included in the kit
- Silicone sealant for extra leak protection
Safety Gear
- Protective gloves to avoid cuts
- Safety glasses when drilling holes
Choosing The Right Soap Dispenser
Choosing the right soap dispenser for your kitchen sink is more than just picking something that looks good. It needs to fit your daily habits, the style of your kitchen, and the type of soap you prefer. Think about what will make your kitchen tasks easier and more enjoyable.
Material And Durability
Soap dispensers come in a variety of materials like stainless steel, plastic, and ceramic. Stainless steel is strong and resists rust, perfect for a busy kitchen. Plastic dispensers might be cheaper but can wear out quickly or look cheap over time.
Consider how often you use your soap dispenser. If it’s a daily essential, invest in a durable option that won’t break or leak. Have you ever had a dispenser break mid-use? Choosing a sturdy one can save you that frustration.
Compatibility With Soap Types
Not all dispensers work with every soap. Some are designed for liquid soap, while others suit foaming soap. If you prefer dishwashing liquid, look for a dispenser that handles thicker soap without clogging.
Also, check if the dispenser is easy to refill. A complicated refill process can turn a simple task into a hassle. What type of soap do you find yourself reaching for most often?
Installation Requirements And Sink Compatibility
Before buying, measure the hole size on your sink or countertop. Some dispensers require a specific hole diameter, and others might need drilling. If your sink doesn’t have a hole, you might need to add one or choose a countertop-mounted model.
Think about the space under your sink too. Some dispensers need extra room for the soap reservoir. Is there enough clearance in your cabinet to fit the dispenser comfortably?
Design And Aesthetic Appeal
Your soap dispenser should complement your kitchen style. Sleek, modern kitchens often pair well with minimalist stainless steel dispensers. Traditional kitchens might look better with ceramic or bronze finishes.
Choosing a dispenser that matches your faucet or hardware can create a cohesive look. How important is kitchen design to you when selecting functional items?
Ease Of Use And Maintenance
Look for dispensers with smooth pump action that don’t require much force. This small detail improves your experience during busy cooking sessions. Easy-to-clean dispensers prevent soap buildup and keep your kitchen hygienic.
Some dispensers are dishwasher safe or have removable parts. These features make cleaning faster and less of a chore. Do you prefer low-maintenance kitchen tools?
Preparing The Sink Area
Preparing the sink area is a crucial part of installing a soap dispenser. It sets the stage for a smooth and efficient installation. Taking the time to get this right can save you frustration later and ensure your dispenser works perfectly.
Clearing The Sink Surface
Start by removing everything around your sink. Dishes, soap bottles, and any clutter should be cleared away to give you space to work. A clean, empty surface helps you focus on the task and prevents accidents.
Wipe down the sink and counter with a damp cloth. This removes grease and dirt that might interfere with the dispenser’s seal. Have you ever tried to install something on a sticky or wet surface? It rarely holds well.
Checking For Existing Holes
Look under and around your sink for any pre-drilled holes. Many kitchen sinks already have a hole for soap dispensers or sprayers. Using an existing hole can save you the trouble of drilling and reduce the risk of damaging your sink.
If you don’t see a suitable hole, measure your soap dispenser’s base. This will guide you on where to drill safely. Remember, avoiding pipes or wiring beneath the sink is key.
Gathering Necessary Tools And Materials
Before you start drilling or assembling, gather all the tools you’ll need. Common items include a drill, screwdriver, plumber’s putty, and a wrench. Having everything at hand keeps you from stopping mid-installation.
It’s easy to overlook small items like plumber’s putty or Teflon tape, but they make a big difference in preventing leaks. Do you have these ready, or will you need to make a quick trip to the hardware store?
Drilling The Hole
Drilling the hole for your kitchen sink soap dispenser requires care and precision. This step is essential to ensure a secure fit and avoid damage to the sink. Proper preparation and the right tools make the process smooth and safe.
Marking The Spot
Start by choosing the best spot near the faucet. Look for a flat area with enough space underneath for the dispenser. Use a pencil or marker to make a clear dot where the hole will go.
Double-check the spot by placing the dispenser’s base on the mark. Make sure it fits well and does not block the faucet or soap pump. Measure twice to avoid mistakes.
Using The Drill
Select a drill bit that matches the soap dispenser’s hole size. Use a bit designed for metal or porcelain if your sink is made of these materials. For stainless steel sinks, a carbide-tipped bit works best.
Wear safety glasses and gloves before drilling. Place a piece of tape over the mark to prevent the drill bit from slipping. Drill slowly and steadily, applying gentle pressure.
Once the hole is through, clean the edges with sandpaper or a file. This prevents sharp edges from damaging the dispenser or your hands. Wipe the area clean before installing the soap dispenser.
Installing The Dispenser
Installing the dispenser on your kitchen sink is a straightforward task that can enhance your kitchen’s functionality. This part of the installation focuses on fitting the pump and securing the dispenser base firmly in place. With a bit of patience and attention to detail, you can have your soap dispenser ready to use in no time.
Inserting The Pump
Start by inserting the pump into the soap container from the top. Make sure the pump shaft slides smoothly through the opening without forcing it. If it feels tight, gently twist it as you push down to avoid damaging any parts.
Once the pump is seated, test the movement by pressing it a few times. It should move freely and return to its original position without sticking. If it feels stuck, check for any misalignment or debris blocking the mechanism.
Securing The Base
The dispenser base needs to be secured tightly to prevent wobbling or leaks. From underneath the sink, screw the mounting nut onto the threaded part of the dispenser. Use your hand first, then tighten it with a wrench for a firm hold.
Be careful not to overtighten as this could crack the sink or the dispenser base. After tightening, give the dispenser a gentle shake to ensure it’s stable. A well-secured base keeps your soap dispenser functioning smoothly every day.
Connecting The Soap Bottle
Connecting the soap bottle to your kitchen sink dispenser is a crucial step that ensures smooth soap flow every time you need it. This part might seem simple, but a secure and correct connection prevents leaks and keeps your countertop tidy. Let’s look at how to attach the tube and secure the bottle effectively.
Attaching The Tube
The tube acts as the link between the dispenser pump and the soap bottle beneath your sink. Start by firmly pushing the tube onto the dispenser’s pump nozzle. Make sure it fits snugly to avoid any soap drips or air gaps.
Check the tube length before attaching—it should reach the bottom of the bottle without kinking or stretching. If it’s too long, trimming it slightly will make the soap flow more consistent. Have you noticed how a loose tube can lead to frustrating clogs or leaks?
Securing The Bottle
Once the tube is attached, place the soap bottle in a stable spot under the sink. Avoid areas where it might tip over or get in the way of cabinet doors. If your bottle has a threaded neck, screw it tightly into the dispenser’s base for a firm hold.
Use any included clips or brackets to keep the bottle steady if your setup allows. This prevents accidental spills and keeps your kitchen looking organized. Think about how much easier refilling is when the bottle stays put without wobbling every time you press the dispenser.
Testing The Dispenser
Testing the soap dispenser after installation is crucial to ensure it works smoothly and efficiently. This step helps you catch any leaks or blockages early, saving you from future frustration. Let’s dive into what you should look for and how to fix common issues during testing.
Check For Proper Soap Flow
Start by pressing the dispenser pump several times. You want to see a steady, consistent flow of soap without sputtering or air bubbles.
If the soap doesn’t come out easily, it might mean the tube isn’t properly connected or there’s an airlock. Gently loosening and tightening connections often solves this.
Inspect For Leaks
Look under the sink where you installed the dispenser. Any wet spots or dripping means a seal or connection is loose.
Use a dry cloth to wipe the area, then press the pump again to spot fresh leaks. Tighten fittings as needed but avoid over-tightening, which can crack plastic parts.
Adjust Pump Tension
Not all dispensers pump with the same pressure. If the pump feels too stiff or too loose, adjust the tension if your model allows it.
This adjustment can improve the soap flow and make using the dispenser more comfortable. It’s a simple fix that makes a big difference in daily use.
Test Different Soap Types
Try using the soap type you plan to keep in the dispenser—whether liquid or gel. Some dispensers handle thicker soaps better than others.
If the dispenser clogs or struggles, consider thinning the soap slightly with water or switching to a different soap formula. This small tweak can save you time and hassle.
Evaluate Pump Placement And Reach
Make sure the pump head is easy to press and comfortably within reach. If it feels awkward, repositioning it might be necessary.
You’ll use this dispenser daily, so comfort and convenience matter. Could a slight adjustment make your kitchen routine smoother?
Maintenance Tips
Keeping your soap dispenser in top shape ensures it works smoothly every time you use it. Regular maintenance not only extends its life but also prevents clogs and leaks that can disrupt your kitchen routine. Let’s look at practical ways to maintain your soap dispenser effectively.
Cleaning The Pump
The pump mechanism can easily get clogged with dried soap or debris. To clean it, remove the pump from the dispenser and soak it in warm water mixed with a little vinegar for about 15 minutes.
After soaking, pump the water through the mechanism several times to flush out any buildup. If the pump still feels sticky, use a small brush or toothpick to clear out stubborn spots.
Have you noticed your dispenser getting harder to press? Regular cleaning can prevent this annoying issue and keep the flow steady.
Refilling The Bottle
Refilling your soap dispenser correctly can prevent spills and messes around your sink. Use a funnel to pour soap into the bottle, avoiding overfilling, which can cause pressure problems with the pump.
Choose liquid soap that matches your dispenser’s design—thicker soaps may clog some pumps. If you switch soap brands, rinse the bottle and pump before adding the new soap to avoid mixing residues.
Next time you refill, watch how much soap you add. Does the pump feel smooth, or is it sluggish? Adjusting the amount and type of soap can make a big difference in performance.
Frequently Asked Questions
How Do I Choose The Right Soap Dispenser For My Sink?
Select a dispenser that fits your sink’s hole size and style. Consider pump type and soap compatibility. Measure before buying.
What Tools Are Needed To Install A Soap Dispenser?
You need a screwdriver, adjustable wrench, and plumber’s putty. These tools help secure and seal the dispenser properly.
Can I Install A Soap Dispenser Without Drilling?
Yes, if your sink has a pre-drilled hole. Otherwise, drilling is required for proper installation.
How Do I Prevent Leaks During Installation?
Use plumber’s putty around the base and tighten fittings securely. Check all connections for a snug fit.
Conclusion
Installing a soap dispenser on your kitchen sink is simple and quick. Follow the steps carefully to avoid mistakes. Use the right tools to make the job easier. A soap dispenser keeps your sink neat and tidy. It also saves space around the sink area.
You can enjoy cleaner hands without much hassle. Try this small upgrade to improve your kitchen’s look. It fits well with any sink style. Give it a try today and see the difference.

Sophie Hartwell is the founder of KitchenQuik.com, where she shares kitchen tips, smart cooking hacks, and the best product picks to make everyday cooking easier and more enjoyable.
