

Have you ever wanted a kitchen knife that feels perfect in your hand and cuts like a dream? Imagine using a blade you crafted yourself—sharp, strong, and made just for you.
Forging your own kitchen knife isn’t as hard as you might think, and it’s a skill that brings pride every time you cook. You’ll discover simple steps and insider tips to help you create a knife that’s truly one of a kind.
Ready to turn raw metal into your new favorite kitchen tool? Let’s get started.
Materials And Tools Needed
Forging a kitchen knife requires specific materials and tools. Choosing the right items is key for a strong, sharp blade. Prepare your workspace with proper equipment and safety gear. The right steel, tools, and protection make the process smooth and safe.
Choosing The Right Steel
Steel type affects the knife’s sharpness, durability, and ease of forging. High-carbon steel is popular for kitchen knives. It holds a sharp edge longer than stainless steel. Stainless steel resists rust but can be harder to sharpen. Tool steel offers good toughness and heat resistance. Pick steel with 0.6% to 1.0% carbon content for best results.
Essential Forging Tools
- Forge or furnace to heat the steel until it glows.
- Anvil or sturdy surface for shaping the blade.
- Hammer to shape and flatten the hot steel.
- Tongs to hold the hot metal safely.
- Grinder or files for smoothing and sharpening edges.
- Quenching container filled with oil or water for cooling.
Safety Equipment
- Heat-resistant gloves to protect your hands.
- Safety goggles to shield eyes from sparks and debris.
- Apron made of leather or thick fabric to protect your body.
- Closed-toe boots to protect feet from hot metal drops.
- Proper ventilation or mask to avoid inhaling smoke or dust.
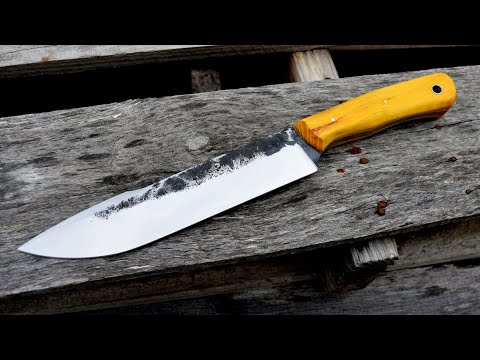
Credit: www.youtube.com
Preparing The Steel
Preparing the steel is a key part of forging a kitchen knife. It sets the base for shaping and hardening. The quality of the steel affects the knife’s sharpness and durability. Start by selecting the right steel type, often high carbon steel for kitchen knives. Then cut and clean the steel before heating and shaping.
Cutting The Steel To Size
Cut the steel bar to the size needed for the knife blade. Use a hacksaw or angle grinder for precise cuts. Measure twice to avoid mistakes. The steel piece should be slightly larger than the final blade shape. This extra material allows for grinding and shaping later. Always wear safety goggles and gloves during cutting.
Cleaning And Inspection
Remove any dirt, rust, or oil from the steel surface. Use a wire brush or sandpaper for cleaning. A clean surface helps in heating the steel evenly. Inspect the steel for cracks, dents, or other damage. Flaws can weaken the knife. Replace the steel if you find serious defects. Clean steel leads to better forging results and a stronger blade.
Heating And Shaping
Heating and shaping are crucial stages in forging a kitchen knife. Proper heating softens the steel, making it easier to shape. Shaping defines the blade’s form and sharpness. Both steps require patience and skill for a quality knife.
Heating The Steel In The Forge
Start by placing the steel in the forge’s hottest area. Heat it until it glows bright orange or yellow. This color shows the steel is soft enough to work. Avoid overheating to prevent damage to the steel’s structure. Keep the steel moving to heat it evenly. Use tongs to handle the hot steel safely.
Hammering The Blade Shape
Remove the heated steel from the forge carefully. Place it on the anvil for hammering. Strike the steel with strong, controlled hits. Focus on elongating and thinning the blade. Check the blade’s shape often to keep it even. Keep reheating the steel as it cools down during shaping.
Creating The Bevels
Bevels form the blade’s sharp edge. Heat the blade again before starting bevels. Use the hammer to taper the edges inward. Make each strike precise to keep symmetry. Gradually thin the edge until it forms a sharp angle. Regularly cool and reheat to maintain workability. Proper bevels improve cutting performance and durability.
Credit: www.reddit.com
Annealing And Normalizing
Annealing and normalizing are crucial heat treatment steps in forging a kitchen knife. These processes help adjust the metal’s structure to improve workability and performance. Understanding how to properly anneal and normalize ensures your blade gains the right balance of strength and flexibility.
Cooling Techniques
The way you cool the blade after heating affects its internal structure. For annealing, slow cooling is key—usually by letting the blade cool inside a turned-off furnace or burying it in insulating materials like sand or ash. This slow drop in temperature softens the steel, making it easier to shape without cracking.
Normalizing requires a different approach. After heating the blade to a specific temperature, you cool it down in open air. This faster cooling refines the grain structure, which enhances the blade’s toughness and prepares it for hardening later. Have you ever noticed how the feel of the blade changes after these cooling methods? That’s the microstructure transforming beneath the surface.
Relieving Internal Stresses
Forging creates stress inside the metal, which can cause warping or cracking if not addressed. Annealing helps relieve these stresses by allowing atoms in the steel to rearrange slowly during cooling. This reduces the risk of damage when you continue shaping or heat treating the blade.
Normalizing also plays a role in stress relief but targets different types of internal strains. It balances the metal’s internal structure, ensuring the blade maintains its shape and strength during further processing. If you skip these steps, you might find your knife bending or breaking unexpectedly during use.
Grinding And Refining The Blade
Grinding and refining the blade is a key step in forging a kitchen knife. It shapes the blade’s edge and smooths its surface. This process improves the knife’s sharpness and overall performance. Careful attention during grinding ensures a durable and precise cutting tool.
Shaping The Edge
Start by grinding the blade to form a sharp edge. Use a coarse grinding wheel to remove excess metal. Hold the blade at a consistent angle to create an even bevel. Move the blade steadily across the wheel to avoid overheating. Check the edge frequently to track your progress. A well-shaped edge improves cutting efficiency.
Smoothing The Surface
After shaping, switch to finer grinding belts or stones. This step removes scratches and rough spots. Polish the blade surface to a smooth finish. Smooth surfaces reduce friction during cutting. Use light, even pressure for the best results. A refined blade looks professional and performs better.
Heat Treatment Process
Heat treatment strengthens the knife by heating and cooling the metal carefully. This process makes the blade harder and more durable. Proper heat treatment ensures a sharp, long-lasting kitchen knife.
The heat treatment process is crucial in making a strong kitchen knife. It involves changing the steel’s structure to improve its hardness and flexibility. This process ensures the blade performs well in everyday kitchen tasks. Two main stages define this process: hardening and tempering.Hardening The Blade
Hardening is the first step in the heat treatment process. The blade is heated to a high temperature, usually above 800°C. This temperature varies based on the type of steel used. The heat alters the steel’s internal structure. After reaching the desired temperature, the blade is rapidly cooled in oil or water. This process is called quenching. It locks the steel in a hard state. But, it’s now brittle and prone to breaking.Tempering For Durability
Tempering follows hardening to reduce brittleness. The hardened blade is heated again, but at a lower temperature. This process usually ranges from 150°C to 300°C. Tempering balances hardness with toughness. It ensures the blade can withstand daily kitchen use without chipping. The exact temperature and time depend on the blade’s purpose. A well-tempered blade offers a perfect balance of strength and flexibility.Handle Crafting And Assembly
Crafting and assembling the handle is a crucial step in making a kitchen knife. The handle must fit well in your hand and offer a strong grip. It also gives the knife its final look and feel. This part requires care and attention to detail.
Selecting Handle Materials
Choose materials that feel comfortable and last long. Common options include wood, plastic, and composite materials. Wood offers a classic look and natural grip. Plastic is easy to clean and resists water. Composite handles combine durability and style. Think about how the material will react to moisture and heat.
Shaping And Attaching The Handle
Start by cutting the material into rough shapes. Use files and sandpaper to smooth the edges and fit the tang of the blade. The tang is the part of the blade that goes inside the handle. Attach the handle securely using pins, rivets, or strong epoxy glue. Make sure the handle does not wobble or move.
Finishing Touches
Sand the handle until it feels smooth but not slippery. Apply oil or varnish to protect wood handles from moisture. Buff plastic or composite handles to add shine. Check the handle for any sharp edges or rough spots. The final handle should feel balanced and comfortable in your hand.
Final Sharpening And Polishing
Final sharpening refines the knife’s edge for precise cutting. Polishing smooths the blade, enhancing its look and rust resistance. This step completes the knife’s craftsmanship with a sharp, clean finish.
The final sharpening and polishing of a kitchen knife are crucial. This stage defines the knife’s performance and visual appeal. A sharp, polished knife not only performs better but also looks stunning in the kitchen. Each stroke and polish breathes life into the blade, preparing it for precision tasks. Let’s delve into these two important aspects.Sharpening Techniques
Start sharpening with a coarse grit stone. It helps in shaping the blade. Maintain a consistent angle, typically 15-20 degrees. Use a smooth, gentle motion. Move from the heel to the tip in each stroke. Flip the knife and repeat on the other side. Switch to a medium grit for finer sharpening. This step refines the edge. Finish with a fine grit stone for a razor-sharp edge. Ensure the blade is clean and dry after sharpening.Polishing For Aesthetic Appeal
Polishing enhances the blade’s look and performance. Use a polishing cloth or buffing wheel. Apply a small amount of metal polish. Rub in smooth, circular motions. Focus on achieving a uniform shine. Remove excess polish with a clean cloth. A polished blade reflects light beautifully. It adds a professional touch to your handmade knife. Regular polishing maintains the blade’s shine and prevents tarnish.Maintenance Tips For Longevity
Maintaining a forged kitchen knife extends its life and keeps it sharp. Simple care habits protect the blade and handle. Small efforts daily lead to long-lasting performance and safety.
Cleaning And Storage
Clean the knife immediately after use. Use warm water and mild soap. Avoid harsh detergents or scrubbing pads that can damage the blade. Dry the knife thoroughly with a soft cloth to prevent water spots and rust.
Store the knife in a dry place. A wooden block or magnetic strip works well. Avoid tossing knives in drawers where they can bump other items and dull the edge.
Regular Sharpening
Keep the blade sharp for better cutting and safety. Use a whetstone or sharpening tool designed for kitchen knives. Sharpen at the correct angle, usually around 20 degrees.
Sharpen often but gently. Too much grinding removes metal and shortens the knife’s life. Test sharpness by slicing through paper or a tomato with little pressure.
Preventing Rust
Rust weakens the blade and ruins the knife’s look. After washing, dry the knife quickly and completely. Oil the blade occasionally with food-safe mineral oil to form a protective layer.
Avoid leaving the knife wet or soaking it in water. Keep knives away from acidic or salty foods for long periods. These substances can speed up corrosion.
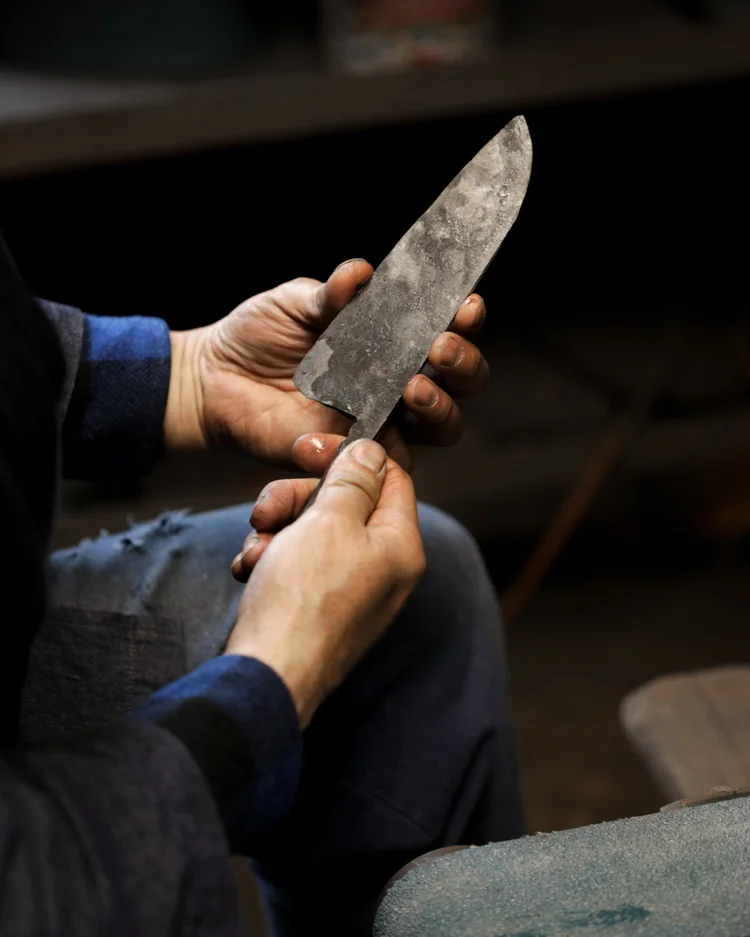
Credit: www.sentomono.com
Frequently Asked Questions
What Materials Are Best For Forging A Kitchen Knife?
High-carbon steel is ideal for forging kitchen knives. It offers excellent hardness, sharpness, and durability. Stainless steel is also popular for its rust resistance and ease of maintenance.
How Long Does It Take To Forge A Kitchen Knife?
Forging a kitchen knife typically takes 3 to 6 hours. The process includes heating, shaping, grinding, and heat treating. Skill level and tools can affect the total time required.
What Tools Are Necessary For Knife Forging At Home?
Essential tools include a forge or propane torch, an anvil, a hammer, tongs, and grinding equipment. Safety gear like gloves and eye protection is also crucial during forging.
How Do You Heat Treat A Forged Kitchen Knife?
Heat treat by heating the blade to a critical temperature, then quenching in oil or water. Temper the blade by reheating at lower temperatures to reduce brittleness and increase toughness.
Conclusion
Forging a kitchen knife takes patience and care. Each step shapes a useful and strong blade. You learn about heat, hammering, and sharpening. The process helps you appreciate the knife’s value. Practice brings better skill and better results. Keep safety in mind while working with tools.
Enjoy making a tool you can use every day. Try it yourself and see the craft come alive.

Sophie Hartwell is the founder of KitchenQuik.com, where she shares kitchen tips, smart cooking hacks, and the best product picks to make everyday cooking easier and more enjoyable.


