
Is your kitchen faucet soap dispenser running low or empty? Knowing how to fill it properly saves you time and keeps your sink area neat and tidy.
You might think it’s tricky or messy, but it’s actually quick and simple once you know the steps. You’ll discover easy tips to refill your soap dispenser without any spills or hassle. Keep reading, and you’ll never have to struggle with a dry dispenser again!
Choosing The Right Soap
Choosing the right soap for your kitchen faucet soap dispenser is more important than many realize. The soap you select affects not only how well your hands get cleaned but also the longevity of your dispenser. Picking a soap that matches your dispenser’s design can save you time and prevent frustrating clogs or damage.
Types Of Soap For Dispensers
Not all soaps work well in dispensers. Here are some common types you might consider:
- Liquid Dish Soap:A popular choice because it cuts grease effectively. Make sure it’s not too thick.
- Foaming Soap:Designed to work with foaming dispensers, it’s usually lighter and mixes with air.
- Hand Soap:Gentle on skin and often formulated to rinse off easily.
- Castile Soap:A natural option made from vegetable oils, it’s biodegradable and mild.
Think about what you use most in your kitchen and pick a soap that fits your daily routine.
Avoiding Clogs And Damage
Thick or gritty soaps can clog your dispenser’s pump quickly. If you’ve ever struggled with a stuck pump, you know how annoying this can be.
Here are tips to keep your dispenser running smoothly:
- Avoid soaps with added exfoliants or beads—they can block the pump.
- If your soap is very thick, dilute it slightly with water before adding it to the dispenser.
- Clean the dispenser regularly by rinsing the pump mechanism to prevent buildup.
- Steer clear of harsh chemicals that might damage the dispenser’s internal parts.
Have you ever thought about how your choice of soap might be causing your dispenser to malfunction? Trying a thinner soap or diluting yours could save you from frequent repairs.
Gathering Necessary Tools
Before you start filling your kitchen faucet soap dispenser, gathering the right tools can make the process smooth and hassle-free. Having everything at hand not only saves time but also prevents any unexpected interruptions.
What You’ll Need
To refill your soap dispenser, you’ll typically need a few basic items. First, a bottle of liquid soap that matches your dispenser’s size is essential. Avoid thick or gel soaps that can clog the pump.
You’ll also want a small funnel to pour the soap without spilling. If your dispenser has a removable pump, having a cloth or paper towel ready will help clean any drips. Sometimes, a screwdriver or pliers might be necessary if you need to remove or tighten parts.
- Liquid soap (not too thick)
- Small funnel
- Cloth or paper towels
- Screwdriver or pliers (optional)
Preparing Your Workspace
Make sure your workspace is clean and dry before you start. Soap spills can make your sink area slippery, so it’s a good idea to lay down a towel or paper towels to catch drips.
Clear any dishes or clutter from around the sink to give yourself enough room to work comfortably. Are you working under tight lighting? Grab a small flashlight or use your phone’s light to see inside the dispenser clearly.
Taking these steps beforehand saves frustration. Have you ever spilled soap and had to clean it up mid-task? Preparing your space helps you avoid that completely.
Removing The Dispenser Pump
Removing the dispenser pump is the first step to refill the kitchen faucet soap dispenser. This part often sits on top of the soap reservoir. Taking it off allows you to pour soap without spills or mess.
The process is simple and requires no special tools. Careful handling avoids damage and keeps the dispenser working well. Understanding how to remove the pump helps maintain your soap dispenser easily.
Locating The Pump
The pump is usually found right above the soap container. Look near the faucet or sink area. It often has a small nozzle where soap comes out.
Check for a round or square piece that you can press down. This part is the pump head. It connects directly to the soap reservoir below.
Steps To Detach The Pump
- Hold the pump head firmly with one hand.
- Turn the pump counterclockwise to loosen it.
- Pull the pump straight up to remove it from the reservoir.
- Set the pump on a clean surface to avoid dirt.
Some pumps may have a locking clip. Press or slide the clip before turning. Avoid using force to prevent breaking the pump.
Filling The Soap Reservoir
Filling the soap reservoir of your kitchen faucet dispenser is a quick task that keeps your sink area tidy and your soap easily accessible. Knowing exactly how to open and refill the reservoir prevents spills and messes, saving you time and frustration.
Opening The Reservoir
Start by locating the soap dispenser pump, usually next to your faucet. Grip the pump head firmly and twist it counterclockwise to unscrew it. If it feels stuck, try applying gentle, steady pressure instead of forcing it, which could damage the dispenser.
Some models have a small cap or cover on top that you need to lift before unscrewing. If you’re unsure, check your dispenser’s manual or look for a visible seam where the pump separates from the base. Once open, you’ll see the reservoir ready to be refilled.
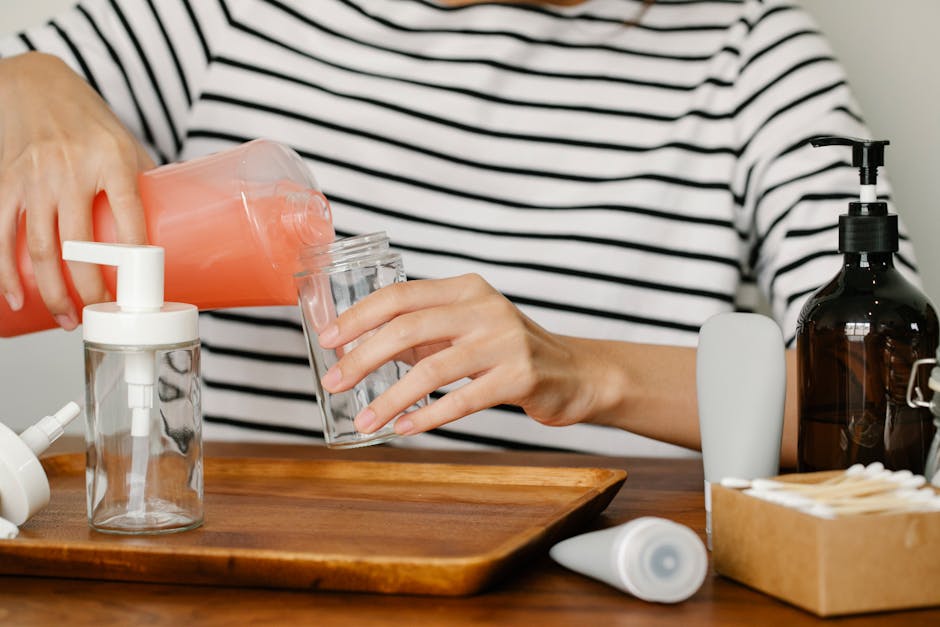
Pouring The Soap Safely
Use a funnel or a narrow spout bottle to pour soap into the reservoir without spilling. Pour slowly to avoid overfilling; most reservoirs have a limited capacity, and overflow can cause sticky messes on your countertop. Stop filling once the reservoir is about ¾ full to leave room for the pump mechanism.
Choose a soap that’s compatible with your dispenser—liquid dish soap or hand soap usually works best. Thick soaps or those with exfoliants can clog the dispenser. Have paper towels ready to wipe any accidental drips immediately, keeping the area clean and slip-free.
Reassembling The Dispenser
Reassembling the dispenser after filling it is a crucial step that ensures your kitchen faucet soap dispenser works smoothly. Missing a detail here can cause leaks or a faulty pump. Taking your time and paying attention to how each part fits will save you future headaches.
Replacing The Pump
Start by placing the pump back into the soap reservoir carefully. Make sure the pump stem aligns correctly with the opening; forcing it can damage the parts. If your dispenser has a spring mechanism, check it’s properly seated to avoid a sticky or unresponsive pump.
Have you noticed your pump not clicking or pumping as it should after reassembly? This often means the pump is either misaligned or the spring is out of place. Gently twisting the pump as you insert it can help it lock into position perfectly.
Securing All Parts
Once the pump is in place, tighten any screws or locking rings by hand to avoid overtightening. A snug fit prevents leaks without stripping the threads. If your dispenser has a separate collar or flange, ensure it’s flush against the sink surface to keep everything stable.
Check the dispenser by pressing the pump a few times before reinstalling the soap bottle. This quick test helps you catch any issues early. When everything feels secure and operates smoothly, you’re ready to clean up and enjoy the convenience of your refilled soap dispenser.
Testing The Soap Dispenser
Testing the kitchen faucet soap dispenser ensures it works smoothly after filling. This step verifies that soap flows easily and the dispenser pump functions properly. It helps spot any issues early before regular use.
Priming The Pump
Press the soap dispenser pump several times to start the flow. This action moves soap from the reservoir to the nozzle. Sometimes, air blocks the soap, so repeated pumping clears it out. Keep pressing until soap appears steadily.
If no soap comes out, check the soap level in the reservoir. Add more if needed and try pumping again. Make sure the pump is screwed on tightly but not too tight.
Troubleshooting Common Issues
- Soap does not dispense:Check for clogs in the pump or nozzle. Clean them with warm water to clear blockages.
- Pump feels stuck or hard to press:Lubricate the pump mechanism gently or clean any dried soap around it.
- Soap leaks from the dispenser:Ensure the reservoir cap is secure. Tighten it if loose.
- Soap flow is weak or slow:Thin the soap with a little water to improve flow.
Maintaining Your Soap Dispenser
Maintaining your kitchen faucet soap dispenser is key to keeping it working smoothly and avoiding any messy surprises. A well-maintained dispenser not only looks good but also lasts longer, saving you time and money. Taking a few simple steps regularly can help you enjoy a hassle-free soap dispensing experience every day.
Regular Cleaning Tips
Soap dispensers can get clogged with dried soap or residue buildup over time. To prevent this, clean the pump and nozzle every few weeks. Remove the dispenser top and soak it in warm water mixed with a little vinegar to dissolve any soap scum.
Use a soft brush or cloth to gently scrub away stubborn residue. Rinse thoroughly before reassembling. Don’t forget to wipe the outer surface to keep it looking fresh and prevent soap stains on your countertop.
Refilling Frequency
How often you need to refill your soap dispenser depends on how much you and your family use it. On average, checking the soap level once a week works well for most households. This helps avoid running out unexpectedly.
Keep a small bottle of liquid soap nearby for quick refills. If you notice the pump is harder to press or dispensing less soap, it might be time to refill even if some soap remains. Have you ever found your dispenser empty right when you needed it most? Staying ahead of refills can save that frustration.
Frequently Asked Questions
How Do I Refill A Kitchen Faucet Soap Dispenser?
To refill, remove the soap reservoir under the sink. Unscrew the cap, pour in liquid soap, and reattach securely. Avoid overfilling to prevent leaks. This keeps your dispenser working smoothly and hygienically.
What Type Of Soap Is Best For Dispenser Filling?
Use liquid dish soap or concentrated hand soap. Avoid thick or gel soaps that can clog the dispenser pump. Choose a soap compatible with your dispenser for optimal performance and easy dispensing.
How Often Should I Refill My Soap Dispenser?
Refill your soap dispenser when the soap level is low. Typically, this is every 2 to 4 weeks, depending on usage. Regular refilling ensures consistent soap flow and prevents air from entering the pump.
Can I Use Homemade Soap In Kitchen Dispensers?
Yes, homemade liquid soap can be used if it’s smooth and not too thick. Strain any particles to avoid clogging the pump. Test small amounts first to ensure compatibility with your dispenser.
Conclusion
Filling your kitchen faucet soap dispenser is simple with the right steps. First, gather your materials. Next, unscrew the pump from the dispenser. Carefully pour soap into the bottle. Screw the pump back on tightly. Test the dispenser to ensure it works properly.
Regular refills keep your kitchen clean and efficient. Remember, avoid overfilling to prevent spills. A well-maintained dispenser saves time and effort. Enjoy a tidy and organized kitchen space. Stay consistent with this routine for best results. Your kitchen deserves the convenience of a well-functioning soap dispenser.

Sophie Hartwell is the founder of KitchenQuik.com, where she shares kitchen tips, smart cooking hacks, and the best product picks to make everyday cooking easier and more enjoyable.


