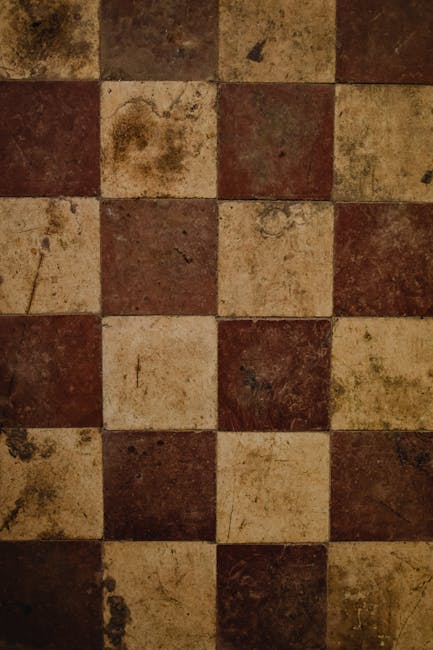

Are you tired of looking at those old kitchen floor tiles every day? You don’t have to live with them or spend a fortune on a full renovation.
What if you could transform your kitchen floor quickly and easily, without the mess and cost of tearing out tiles? You’ll discover simple and effective ways to cover up your old kitchen floor tiles and give your space a fresh new look.
Keep reading, because your dream kitchen floor is closer than you think.
Assessing The Current Floor Condition
Assessing the current floor condition is the first step before covering old kitchen tiles. This check helps you understand what work is needed. It ensures the new floor covers well and lasts long.
Start by looking closely at the tiles for damage. Check for cracks, chips, and loose tiles. Note any uneven areas or signs of water damage. These problems can affect the new floor’s stability.
Next, test the floor’s strength. Walk over the tiles and feel for any movement or hollow sounds. Weak spots may need repair before covering. A strong base is important for safety and durability.
Inspecting Tile Surface For Damage
Look for visible cracks and chips on the tiles. Check grout lines for gaps or crumbling. Identify any missing or loose tiles. Surface damage can cause issues under new flooring.
Checking For Moisture Or Water Damage
Moisture can ruin new floor coverings quickly. Use a moisture meter or place plastic sheets on the floor for 24 hours. If condensation forms, the floor may have moisture problems. Fix leaks and dry the area first.
Evaluating Floor Levelness
Use a level tool to find uneven spots. Small bumps or dips can cause problems with new floors. Mark areas that need leveling. A flat surface helps the new floor lay smooth.
Testing Tile Adhesion And Stability
Press tiles gently to check if they move or lift. Loose tiles should be removed or reattached. Strong adhesion prevents future floor damage. Ensure the floor feels solid underfoot.
Peel And Stick Vinyl Tiles
Peel and stick vinyl tiles offer a simple and effective way to cover up old kitchen floor tiles without the mess and expense of a full renovation. These tiles come with a sticky backing, allowing you to apply them directly over existing floors. They’re perfect for quick updates and can dramatically change the look of your kitchen with minimal effort.
Advantages Of Vinyl
Vinyl tiles are water-resistant, making them ideal for kitchen spaces where spills are common. They come in a wide range of colors and patterns, so you can easily find a style that matches your kitchen’s vibe.
One of the biggest benefits is how budget-friendly they are compared to other flooring options. Plus, vinyl tiles provide a comfortable surface to stand on, which is a nice bonus during long cooking sessions.
Installation Tips
Before starting, clean your existing floor thoroughly to remove any dirt or grease. A smooth, dry surface helps the tiles stick better and last longer.
Measure your kitchen carefully and plan the layout to avoid awkward cuts around cabinets or appliances. Start from the center of the room and work your way outwards to keep the pattern balanced.
- Peel the backing slowly to avoid the tile sticking to itself.
- Press firmly to secure each tile, especially along edges and corners.
- Use a utility knife for precise cuts around obstacles.
Have you ever tried updating your floor without ripping out the old tiles? Peel and stick vinyl might surprise you with how easy and effective it can be.
Laminate Flooring Options
Laminate flooring offers a practical and stylish way to cover old kitchen floor tiles. It is affordable, easy to install, and requires little maintenance. This flooring type can transform your kitchen without the hassle of removing old tiles. It also provides a smooth, clean surface that feels warm underfoot. Choosing the right laminate flooring depends on durability and design options.
Durability Factors
Laminate flooring resists scratches and stains well. It stands up to daily kitchen traffic without wearing out quickly. Water-resistant options protect against spills and moisture damage. Thickness plays a key role; thicker planks usually last longer. Look for high AC ratings, which indicate better durability for kitchens. Proper underlayment improves comfort and reduces noise. Maintenance is simple—sweeping and occasional mopping keep it fresh.
Design Variations
Laminate comes in many styles to match your kitchen decor. Wood-look laminates mimic oak, maple, or walnut with realistic textures. Stone and tile patterns offer a modern, clean appearance. Color choices range from light to dark tones. Some designs include bevel edges for added depth. You can mix plank widths for a unique layout. This variety lets you personalize your kitchen floor easily.
Paint And Stencil Techniques
Painting and stenciling old kitchen floor tiles can instantly refresh your space without the mess and expense of replacing them. These techniques offer a creative way to customize your floors, adding personality and charm that suits your style. The key is choosing the right materials and designs to ensure durability and a polished look.
Choosing The Right Paint
The type of paint you select makes all the difference for a long-lasting finish on kitchen tiles. Look for paints specifically formulated for floors or tiles, as they provide better adhesion and resist wear. Epoxy-based paints or porch and floor paints are solid choices because they handle foot traffic and cleaning well.
Before painting, clean and sand the tiles lightly to help the paint stick. You might wonder if primer is necessary—it usually is. A good primer creates a smooth base and prevents peeling. Don’t skip this step; it can save you from a disappointing finish later.
Consider the color carefully. Lighter shades can brighten the kitchen but may show dirt more easily. Darker colors hide stains but might make the room feel smaller. What mood do you want your kitchen floor to set?
Creative Stencil Ideas
Stenciling lets you add unique patterns and textures to your kitchen floor without a huge commitment. Geometric shapes, floral patterns, or even Moroccan-inspired designs can turn dull tiles into a standout feature. You can repeat a single stencil or mix different ones for a custom look.
Start with a simple design if you’re new to stenciling. Use painter’s tape to keep the stencil in place and a sponge or stencil brush to apply paint evenly. How detailed do you want your floor to be? Small, intricate patterns create a delicate look, while large bold shapes make a strong statement.
Think about color contrast too. A stencil in a contrasting color to your base paint will pop, but subtle shades can create an elegant, understated effect. Layering colors and patterns can also add depth—why not try a soft shadow effect under your main stencil?
Cork Flooring Benefits
Cork flooring offers a unique solution when covering up old kitchen floor tiles. It combines style with practical benefits that enhance your kitchen’s comfort and sustainability. If you’re considering a flooring update, understanding the advantages of cork can help you make a confident choice.
Eco-friendly Features
Cork is harvested from the bark of cork oak trees without cutting the tree down, making it a renewable resource. This process allows the tree to continue growing and absorbing carbon dioxide, which helps reduce your home’s carbon footprint.
Choosing cork flooring means supporting a sustainable product that breaks down naturally at the end of its life. Plus, cork production uses less energy compared to other flooring materials, which adds to its eco-friendly appeal.
Comfort And Insulation
Cork has a natural softness underfoot, which makes standing in your kitchen for long periods much easier on your feet and joints. The material also absorbs sound, reducing noise from footsteps or dropped utensils, creating a calmer environment.
Its insulating properties keep your kitchen warmer in winter and cooler in summer, potentially lowering your energy bills. Have you ever noticed how cold tiles feel in the morning? Cork flooring can eliminate that discomfort, offering a consistently pleasant surface.
Carpet Tiles For Kitchens
Carpet tiles offer a smart and stylish way to cover up old kitchen floor tiles without the hassle of a full renovation. They lay down quickly and provide a soft surface underfoot, which can make your kitchen feel warmer and more inviting. Plus, they give you the flexibility to change patterns or colors whenever you want, keeping your kitchen fresh and personalized.
Easy Maintenance
One of the biggest advantages of carpet tiles is how easy they are to maintain in a kitchen setting. If a tile gets stained or damaged, you don’t have to replace the entire floor—just swap out the affected tile. This saves time and money and keeps your kitchen looking neat.
Most carpet tiles are designed to resist spills and dirt, making cleanup quick and painless. Regular vacuuming and spot cleaning with mild detergent usually do the trick. Have you ever considered how much effort you spend scrubbing grout lines on old tiles? Carpet tiles eliminate that frustration entirely.
Color And Texture Choices
Carpet tiles come in a wide range of colors and textures, allowing you to customize your kitchen floor to match your style. You can create bold patterns or stick to subtle tones that blend with your cabinets and walls. This versatility means your floor can be as unique as your cooking space.
Think about mixing textures—combining smooth and looped fibers can add depth and interest. Are you drawn to bright colors or neutral shades? Whatever your preference, carpet tiles give you the freedom to design a floor that reflects your personality.
Rug Layering For Aesthetic Appeal
Rug layering creates a beautiful look while hiding old kitchen floor tiles. It adds warmth and texture to the space. This technique brings style and comfort to your kitchen without major renovations. Rugs can cover damaged tiles and refresh the room’s appearance easily.
Using multiple rugs allows creative freedom. You can mix patterns, colors, and sizes. Layering rugs makes the floor a focal point. It also softens the hard surface, making the kitchen feel cozy.
Selecting Suitable Rugs
Choose rugs with durable materials that handle kitchen traffic. Natural fibers like wool or jute work well. Pick rugs with non-slip backing for safety. Size matters; use larger rugs as the base layer. Smaller rugs can go on top for interest.
Colors should complement your kitchen’s theme. Neutral tones blend with most styles. Bold colors create a statement and hide dirt. Patterns can distract from old tiles beneath.
Layering Techniques
Start with a large, neutral rug covering most tile areas. Place smaller rugs partially over the base rug. Align edges to create balance and flow. Mix textures for a rich look.
- Use a flat-weave rug under a plush one for contrast
- Overlap rugs slightly for seamless coverage
- Arrange rugs to define kitchen zones, like near the sink or stove
Rug layering allows easy changes. Switch rugs seasonally or for a fresh look. This method hides old tiles effectively while enhancing kitchen style.
Professional Installation Services
Covering old kitchen floor tiles requires skill and precision. Professional installation services offer expert knowledge to ensure a smooth and durable finish. Trained installers use proper tools and techniques to handle different flooring materials. Their experience helps avoid common mistakes that can cause damage or uneven surfaces.
Experts also save time and reduce stress during the renovation process. They handle preparation, installation, and cleanup efficiently. This service guarantees a high-quality result that lasts longer and looks better than a DIY attempt.
When To Hire Experts
Choose professional help if the floor is uneven or damaged. Complex tile patterns or multiple layers need special care. Large kitchen areas require more effort and precision. Hire experts if you want to use heavy or delicate materials. Also, consider professionals for tight deadlines or limited tools.
Cost Considerations
Professional installation costs vary by project size and materials. Labor fees depend on the flooring type and complexity. Additional charges may apply for floor preparation or removing old tiles. Budget for quality materials and skilled labor to avoid future repairs. Investing in experts can save money over time by preventing mistakes.
Frequently Asked Questions
What Are The Best Materials To Cover Old Kitchen Floor Tiles?
Popular materials include vinyl planks, laminate flooring, and engineered wood. These options are easy to install, durable, and cost-effective. They also provide a fresh look without removing old tiles. Choose materials that suit your kitchen’s style and foot traffic.
Can I Install New Flooring Directly Over Old Tiles?
Yes, you can install new flooring over old tiles if the surface is clean, level, and stable. Proper preparation prevents issues like uneven floors or adhesion problems. Vinyl and laminate are ideal for this method, saving time and reducing renovation costs.
How Do I Prepare Old Tiles Before Covering Them?
Clean the tiles thoroughly to remove grease and dirt. Repair any cracks or loose tiles. Sand glossy surfaces to improve adhesion. Use a leveling compound if needed to create a smooth base for the new flooring.
Is Covering Old Kitchen Tiles Cost-effective?
Covering old tiles saves money by avoiding tile removal and disposal fees. It reduces labor time and material costs. This approach also minimizes disruption in your kitchen, making it a budget-friendly renovation option.
Conclusion
Covering old kitchen floor tiles can refresh your space quickly. Choose a method that fits your budget and style. Simple options include peel-and-stick tiles or vinyl planks. These require little effort but create big changes. Proper preparation helps materials stick and last longer.
Take your time and measure carefully before starting. Small changes can make your kitchen look new again. Enjoy your updated floor without the mess of removal. A fresh floor brings warmth and comfort to your home.

Sophie Hartwell is the founder of KitchenQuik.com, where she shares kitchen tips, smart cooking hacks, and the best product picks to make everyday cooking easier and more enjoyable.