You’ve noticed that unsightly hole on your kitchen island, and it’s driving you crazy. It can ruin the whole look of your space and make cooking or gathering feel less inviting.
But don’t worry—you don’t have to replace the entire island or spend a fortune to fix it. You’ll discover simple, effective ways to cover up that hole quickly and beautifully. Whether you want a DIY fix or a polished professional look, you’ll find solutions that fit your style and budget.
Keep reading to transform your kitchen island from an eyesore to a centerpiece you’re proud of.
Assessing The Damage
Before you jump into fixing a hole on your kitchen island, it’s crucial to assess the damage thoroughly. Understanding exactly what kind of hole you’re dealing with and its size will guide your repair choices. Without this step, you risk using the wrong materials or techniques, which can make the problem worse or less durable.
Identifying The Type Of Hole
Start by looking closely at the hole. Is it a small chip, a puncture, or a larger gouge? Knowing this helps determine if you need simple filler, a patch, or a more extensive repair.
Consider what caused the hole—was it a dropped knife, water damage, or wear and tear? This can affect the repair method and materials you select.
Ask yourself: does the hole expose underlying wood, or is it just a surface scratch? This detail changes your approach significantly.
Measuring The Size And Depth
Grab a ruler or measuring tape to get exact dimensions of the hole. Measure both the width and length to understand how much area you’re dealing with.
Next, check the depth—this is just as important as the surface size. Deeper holes may require multiple layers of filler or even structural support.
Write down these measurements. Having precise numbers will make shopping for repair materials easier and more accurate.
Simple Repair Solutions
Fixing a hole on your kitchen island doesn’t have to be complicated or expensive. Simple repair solutions can restore both the look and function of your island quickly. Whether the hole is small or a bit larger, there are effective ways to cover it up that even beginners can handle with ease.
Filling With Wood Putty
Wood putty is a quick fix for small holes or dents on your kitchen island. You just need to clean the area first, then apply the putty with a putty knife, pressing it firmly into the hole. After it dries, sanding it smooth will make the repair nearly invisible.
Choose a putty color that closely matches your island’s finish. This makes a big difference in achieving a seamless look. Have you ever noticed how a well-matched putty can blend so well that even close-up, it’s hard to spot?
Using Epoxy For Larger Holes
When the hole is bigger, wood putty might not hold up well. Epoxy is a stronger option that can fill larger gaps and provide a durable surface. You’ll mix two parts of the epoxy before applying it, so make sure to work quickly but carefully.
Once the epoxy hardens, you can sand and paint it to match your island’s surface. This method not only covers the hole but also reinforces the area to prevent further damage. Have you considered how a little extra effort here can save you from replacing the whole island later?
Decorative Cover-ups
Decorative cover-ups transform a hole on your kitchen island into a stylish feature. These options hide damage while adding charm and function. Choose ideas that suit your kitchen’s style and your skill level.
Installing A Cutting Board
A cutting board can cover a hole and become a useful workspace. Select a board large enough to hide the damage completely. Wood boards add warmth and match many kitchen designs.
Mount the board securely with screws or brackets. Make sure it is stable and easy to remove for cleaning. This cover-up blends function with style effortlessly.
Adding A Decorative Tile
Decorative tiles create a colorful, artistic cover-up for holes. Choose tiles that contrast or complement your countertop. Mosaic patterns add visual interest and texture.
Use tile adhesive to fix the tiles firmly over the hole. Apply grout for a smooth, finished look. Tiles are durable and easy to clean, perfect for kitchen islands.
Creative Design Options
Creative design options turn a kitchen island flaw into a unique feature. These ideas blend function with style, hiding holes while enhancing the space. They offer fresh looks without costly repairs.
Creating A Mosaic Pattern
Mosaic patterns use small tiles to cover the hole. Choose colors that match or contrast your kitchen decor. Arrange tiles in shapes or random designs for a personal touch.
This method adds texture and visual interest to the island. It can be a fun DIY project using ceramic, glass, or stone tiles. Seal the surface to protect it from spills and stains.
Incorporating A Chalkboard Panel
A chalkboard panel covers the hole and adds practical use. Paint a wooden board with chalkboard paint and attach it over the damaged area. It becomes a spot for notes, recipes, or doodles.
This option suits busy kitchens and family homes. It keeps the island functional and lively. Change chalk drawings anytime for a fresh look without extra cost.
Temporary Fixes
Temporary fixes are a great way to hide a hole on your kitchen island without committing to a full repair right away. These quick solutions help maintain the island’s appearance while you plan a permanent fix. Plus, they can add a touch of style or functionality to your kitchen space.
Using A Table Runner
A table runner is an easy and attractive way to cover a hole on your kitchen island. Choose a runner that complements your kitchen’s color scheme to keep the look cohesive. The fabric can cover the damaged area while adding texture and warmth to the surface.
If the hole is near the center, position the runner lengthwise so it fully conceals the spot. You can even layer it with placemats or small decorative items to draw attention away from the damaged area. Have you tried using a fabric runner in unexpected ways before?
Placing A Decorative Tray
A decorative tray is another clever way to hide a hole while enhancing your kitchen’s style. Pick a sturdy tray that fits the size of the damaged section or slightly larger. This allows you to place everyday items like fruit bowls, salt and pepper shakers, or candles on top.
Trays can be moved easily, making this a flexible fix that doesn’t require any tools or permanent changes. Plus, a well-chosen tray can become a focal point, turning a flaw into a feature. What items do you think would look best displayed on a tray in your kitchen?
Choosing Materials And Tools
Choosing the right materials and tools is key to fixing a hole on your kitchen island. The proper selection helps the repair last longer and look better. It also makes the process easier and faster. Focus on adhesives and finishes that match your kitchen island’s surface. Quality materials ensure a neat, seamless repair.
Selecting The Right Adhesive
Pick an adhesive that bonds well with your island’s material. Wood glue works best for wooden surfaces. For stone or granite, use epoxy or a strong construction adhesive. Check that the adhesive dries clear to avoid visible marks. Make sure it sets quickly but allows enough time to adjust the patch. Proper adhesion prevents the hole from reopening.
Picking The Perfect Finish
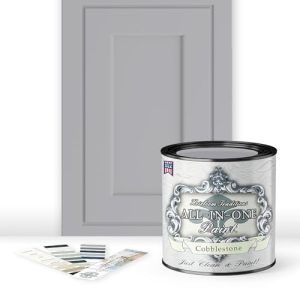
The finish hides the repair and blends it with the rest of the island. Choose paint, stain, or sealant matching your island’s color and texture. For wood, use a stain that matches the grain. For laminate or stone, pick paint or sealant that resists moisture and heat. Apply the finish in thin, even layers for the best look. A smooth finish makes the repair almost invisible.
Tips For Seamless Integration
Achieving a flawless look on your kitchen island after covering a hole requires careful attention to detail. Seamless integration means the repair should be hardly noticeable. This section provides practical tips to help your fix blend perfectly with the rest of the island.
Matching Colors And Textures
Color matching is key to hiding repairs. Use paint or stain that closely matches your island’s surface. Test small areas first to ensure the right shade. Texture matters too. If the surface is smooth, sand the patch lightly. For rough or grainy textures, try using a textured paint or finish. This helps the repair blend naturally with the surrounding area.
Blending With Existing Decor
Consider the overall style of your kitchen. Use materials and finishes that complement the existing decor. If your island has decorative trim, extend this trim over the patch. Add small accessories or plants nearby to draw attention away from the repaired spot. This approach makes the repair part of the overall design instead of an eyesore.
Maintenance And Care
Keeping your kitchen island looking flawless after fixing a hole takes ongoing effort. Maintenance and care are crucial to ensure your repair blends seamlessly and lasts long. Paying attention to small details can save you from costly touch-ups later.
Regular Cleaning Techniques
Clean your kitchen island regularly to prevent dirt and grime from settling into the repair area. Use a soft cloth with mild soap and warm water—harsh chemicals can weaken fillers or paint. Avoid abrasive sponges that might scratch the surface around the patch.
Wipe spills immediately to stop stains from setting in. If your island has a wood finish, applying a wood conditioner occasionally keeps it hydrated and prevents cracks. Have you noticed how a quick daily wipe extends the life of your surfaces?
Preventing Future Damage
Think about what caused the hole in the first place and adjust your habits to avoid repeating it. Use cutting boards and trivets instead of cutting or placing hot pots directly on the island. This simple change protects both the repair and the rest of the surface.
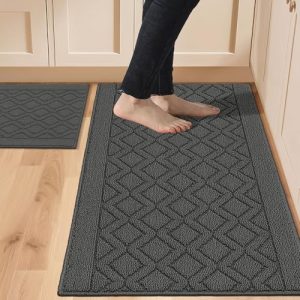
Consider adding a clear protective coating over the repaired spot for extra durability. If your kitchen island is a high-traffic area, placing decorative mats or runners can shield vulnerable spots without sacrificing style. What small change can you make today to keep your island pristine?
Frequently Asked Questions
How Can I Quickly Cover A Hole On My Kitchen Island?
You can use wood filler, a patch kit, or a decorative cover. These options are fast, affordable, and easy to apply. Ensure the surface is clean and dry before applying any material for the best results.
What Materials Are Best For Repairing Kitchen Island Holes?
Wood filler, epoxy putty, or matching wood patches work well. Choose a material that blends with your island’s surface. Sand and finish after application to create a smooth, seamless repair.
Can I Hide A Kitchen Island Hole With Decor?
Yes, placing a vase, bowl, or cutting board over the hole can hide it stylishly. This is a quick, non-permanent solution that adds charm and functionality to your space.
Is It Possible To Repair A Large Hole On A Kitchen Island?
Yes, for large holes, use a wood patch or replace the damaged section. Professional help may be needed for a seamless finish. Proper tools and materials ensure durability and aesthetic appeal.
Conclusion
Fixing a hole on your kitchen island can be simple and quick. Small repairs or creative covers work well to hide damage. Choose materials that match your kitchen style for a neat look. Take your time to measure and fit pieces carefully.
This keeps your island looking fresh and new. A little effort can save you money and improve your space. Now, your kitchen island can look great again without much hassle.

Sophie Hartwell is the founder of KitchenQuik.com, where she shares kitchen tips, smart cooking hacks, and the best product picks to make everyday cooking easier and more enjoyable.