Are your kitchen tiles making you cringe every time you walk in? Ugly or outdated tiles can ruin the look of your entire kitchen, leaving you frustrated and unsure of what to do.
But what if you didn’t have to tear everything out or spend a fortune on renovations? Imagine giving your kitchen a fresh, stylish makeover quickly and easily. You’ll discover simple, budget-friendly ways to cover those ugly kitchen tiles and transform your space into the beautiful kitchen you deserve.
Keep reading—you’ll be amazed at how easy it can be to love your kitchen again!
Peel And Stick Tiles
Peel and stick tiles offer an easy way to cover ugly kitchen tiles without heavy work. These tiles come with adhesive backs that stick directly to your existing tiles. They create a fresh, modern look quickly and cleanly. This option saves time and money compared to full tile replacement.
Peel and stick tiles are lightweight and easy to cut to size. They are water-resistant, making them good for kitchen walls. You can find many styles and colors to match your kitchen’s theme. They work well on smooth, clean surfaces for the best adhesion.
Preparing The Surface
Clean the kitchen tiles thoroughly before applying peel and stick tiles. Remove grease, dirt, and dust to help the new tiles stick well. Use a mild cleaner and a soft cloth. Let the surface dry completely before starting.
Measuring And Cutting Tiles
Measure the area you want to cover carefully. Cut the peel and stick tiles with scissors or a utility knife. Cut slowly to ensure straight edges. Dry-fit the tiles first to check placement and fit.
Applying Peel And Stick Tiles
Peel off the backing paper from the tile’s adhesive side. Press the tile firmly onto the existing tile. Smooth out bubbles or wrinkles using a flat tool or your hand. Work from one corner to the opposite side for even placement.
Finishing Touches
Trim any excess tile around edges or outlets. Use matching caulk or sealant to fill gaps if needed. Avoid heavy scrubbing to protect the adhesive. Clean gently with a damp cloth to keep tiles looking fresh.
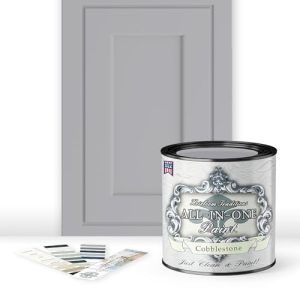
Tile Paint Options
Choosing the right paint can dramatically change how your kitchen tiles look without the hassle of replacing them. Tile paint options vary in durability, finish, and ease of application, so picking the right one matters. Let’s look at some popular choices that can help you cover up those ugly kitchen tiles effectively.
Epoxy Paint For Tiles
Epoxy paint is a top choice if you want something strong and long-lasting. It creates a hard surface that resists stains, water, and heat—perfect for kitchen environments. Applying epoxy paint requires careful surface prep and good ventilation, but the result is worth the effort.
If you’ve ever dealt with chipped or faded tiles, epoxy paint can make them look new again with a smooth, glossy finish. Have you checked if your kitchen tiles are properly cleaned and sanded before painting? That step makes a huge difference in how well epoxy paint sticks.
Latex Paint With A Bonding Primer
Latex paint can work on tiles if paired with a bonding primer. This combo ensures the paint sticks to the smooth tile surface. It’s easier to apply than epoxy and dries faster, making it a good choice if you want a quick refresh.
Though latex paint isn’t as tough as epoxy, using a high-quality sealer on top can add extra protection. Think about the color and finish you want—matte, satin, or glossy—since latex paints come in a wide range of options.
Chalk Paint For A Matte Look
Chalk paint offers a unique, matte finish that can give your kitchen a cozy and vintage vibe. It’s super easy to apply, often without needing primer or sanding. This makes it ideal for renters or those not wanting to invest too much time.
However, chalk paint isn’t very durable on its own. You’ll need to seal it with wax or a clear topcoat to protect it from water and stains. Have you thought about how much maintenance you’re willing to do after painting?
Spray Paint Designed For Tiles
Spray paints formulated for tiles provide a smooth and even coat without brush marks. They dry quickly and can reach tight grout lines that brushes might miss. This option is great if you want a sleek, uniform look with less effort.
Keep in mind spray paint requires good ventilation and a dust-free environment to avoid imperfections. Have you prepared your space to prevent overspray and ensure a clean finish?
Decorative Tile Stickers
Decorative tile stickers offer a quick and budget-friendly way to transform ugly kitchen tiles without the mess of renovation. They come in a variety of colors, patterns, and textures that can match your kitchen’s style instantly. Plus, they are easy to apply and remove, making them perfect if you like to refresh your space often.
Have you ever felt stuck with old tiles that just don’t fit your vibe? Tile stickers can be the solution you didn’t know you needed. They allow you to customize your kitchen walls or backsplash in a matter of minutes, giving your kitchen a fresh look with minimal effort.
Choosing The Right Design For Your Kitchen
Pick a design that complements your kitchen’s existing colors and style. If your kitchen is modern, geometric patterns or sleek metallic finishes can enhance the look. For a cozy or rustic kitchen, consider floral or mosaic patterns that add warmth and charm.
Think about the size of your tiles too. Smaller tiles may work better with simple, bold patterns, while larger tiles can handle more intricate designs. This makes your space feel balanced rather than busy or cluttered.
How To Apply Tile Stickers Easily
Start by cleaning your tiles thoroughly to remove grease and dirt. This step ensures the stickers stick well and last longer. Use a soft cloth and mild cleaner, then dry completely before applying stickers.
Peel the sticker slowly and place it carefully on the tile surface. Smooth out any bubbles with a flat edge like a credit card. Taking your time here prevents wrinkles and helps your kitchen look professionally updated.
Caring For Your Tile Stickers
Tile stickers are durable but need gentle care to keep them looking great. Avoid harsh scrubbing or abrasive cleaners which can peel or damage them. Instead, wipe gently with a damp cloth and mild soap when needed.
If a sticker starts to peel at the edges, press it back down or replace it quickly to maintain a neat appearance. This simple maintenance extends the life of your kitchen makeover without extra cost.
Using Contact Paper
Using contact paper is an easy and budget-friendly way to transform ugly kitchen tiles without the mess of a full renovation. It offers a quick fix that looks fresh and modern, giving your kitchen a new vibe in just a few hours. Plus, it’s simple to remove if you want to change the look later on.
Choosing The Right Contact Paper
Pick contact paper with a pattern or color that complements your kitchen’s style. Matte finishes hide imperfections better, while glossy ones add shine but may highlight uneven surfaces. Don’t forget to measure your tiles carefully to buy enough material—running out halfway can ruin your project.
Preparing Your Tiles For Application
Clean your tiles thoroughly to remove grease, dust, and grime. Use warm soapy water and a scrub brush, then dry completely with a lint-free cloth. A smooth, clean surface helps the contact paper stick better and last longer.
Applying Contact Paper Smoothly
Start by peeling a small section of the backing off and aligning the paper with the edge of the tile. Use a plastic card or squeegee to press the paper down, smoothing out air bubbles as you go. Work slowly and peel the backing gradually to avoid wrinkles and make adjustments easier.
Trimming And Finishing Touches
Once the paper is applied, trim excess edges with a sharp utility knife for a clean look. Pay special attention to corners and grout lines to make the paper fit perfectly. If you want, seal the edges with clear adhesive tape to prevent peeling over time.
Maintaining Your Contact Paper Surface
Clean your new tile cover gently with a damp cloth and mild soap—avoid abrasive cleaners that can damage the paper. If a section starts to peel, press it down again or replace that tile’s paper to keep your kitchen looking fresh. How much time could you save by skipping a full tile replacement?
Creative Stenciling
Creative stenciling offers a simple way to transform ugly kitchen tiles. It hides imperfections and adds style with patterns and colors. This technique requires minimal tools and is budget-friendly. Anyone can create stunning tile designs with a little patience and creativity.
Choosing The Right Stencil Design
Select a stencil pattern that matches your kitchen style. Geometric shapes suit modern kitchens. Floral or vintage patterns fit classic kitchens. Pick a design that covers the tile surface well. Larger patterns hide more flaws. Smaller patterns add subtle texture.
Preparing Tiles For Stenciling
Clean tiles thoroughly to remove grease and dirt. Use a mild detergent and warm water. Dry tiles completely before stenciling. Lightly sand glossy tiles for better paint adhesion. Tape the stencil securely to prevent slipping. Protect surrounding areas with painter’s tape.
Painting Tips For Best Results
- Use a stencil brush or sponge for even paint application.
- Apply paint in light layers to avoid bleeding.
- Lift the stencil carefully to prevent smudging.
- Allow paint to dry between layers.
- Seal the painted tiles with a clear topcoat for durability.
Install Beadboard Panels
Installing beadboard panels is a smart way to hide ugly kitchen tiles. This option adds texture and charm to your kitchen walls. Beadboard panels are easy to install and create a fresh, clean look. They come in various sizes and finishes, fitting many kitchen styles.
Beadboard panels cover old tiles completely, giving your kitchen a smooth surface. They also protect the walls from moisture and stains. This solution works well in kitchens that need a quick and affordable update without major renovations.
Choose The Right Beadboard Panels
Select panels that match your kitchen’s style. You can find beadboard in wood, MDF, or vinyl. Wood gives a classic look but needs sealing. MDF is budget-friendly and easy to paint. Vinyl is moisture-resistant and good for busy kitchens.
Prepare The Wall Surface
Clean the tile surface well before installation. Remove grease, dirt, and loose grout. Make sure the wall is dry and smooth. Sand down any rough spots to help panels stick better.
Cut And Fit The Panels
Measure the tiled area accurately. Cut the beadboard panels using a saw or utility knife. Dry-fit the panels to check alignment. Trim edges carefully to avoid gaps and uneven lines.
Attach The Panels Securely
- Use construction adhesive for strong hold.
- Press panels firmly against the wall.
- Use finishing nails or screws for extra support.
- Place fasteners in the grooves to hide them.
Seal And Paint The Beadboard
Apply caulk to fill gaps and seams. This step prevents moisture from getting behind panels. Paint the beadboard with kitchen-safe paint. Choose colors that brighten the space and match your décor.
Apply A Tile Decal
Applying tile decals is an easy way to cover ugly kitchen tiles. These decals come in many designs and colors. They stick directly on your tiles and change their look quickly. You can refresh your kitchen without removing old tiles. The process is simple and requires no special tools. It also saves money and time compared to full tile replacement.
Choose The Right Tile Decal
Pick decals made for kitchen use. Look for water-resistant and heat-proof materials. Measure your tiles carefully before buying. Select colors and patterns that match your kitchen style. Simple designs work well for small kitchens. Bold patterns can add a modern touch to larger spaces.
Prepare The Tile Surface
Clean the tiles thoroughly to remove grease and dirt. Use soap and warm water or a mild cleaner. Dry the tiles completely before applying decals. Smooth and dry surfaces help decals stick better. Avoid applying decals on cracked or loose tiles.
Apply The Tile Decal
Peel the backing off the decal slowly. Align it carefully over the tile surface. Press from the center outwards to remove air bubbles. Use a soft cloth to smooth the decal firmly. Repeat the process for each tile you want to cover. Allow the decals to set for a few hours before using the area.
Maintain And Remove Tile Decals
Clean decals gently with a soft cloth and mild cleaner. Avoid harsh scrubbing or abrasive materials. Decals may last several years with proper care. Remove them by peeling slowly from the tile surface. Use warm soapy water to help loosen any residue. This leaves your original tiles unharmed and ready for new decor.
Fabric And Mod Podge Technique
The Fabric and Mod Podge Technique offers a creative and budget-friendly way to cover ugly kitchen tiles. It transforms your tiles with fabric patterns you love, giving your kitchen a fresh and unique look. Plus, it’s a fun DIY project that lets you personalize your space without heavy remodeling.
Choosing The Right Fabric
Select fabric that suits your kitchen’s style and can handle moisture. Cotton and linen fabrics work well, but avoid anything too thin or delicate. Think about patterns that complement your cabinets and countertops.
Consider colors that brighten the room or add a bold contrast. Don’t hesitate to bring home fabric samples and hold them up against your tiles to see how they look in different lighting.
Preparing Your Tiles
Clean your tiles thoroughly to remove grease and dirt. Use a strong cleaner and let the surface dry completely. This step ensures the fabric sticks properly and lasts longer.
Lightly sanding the tiles can help the Mod Podge adhere better. Wipe away any dust after sanding so your fabric lays smooth without bumps.
Applying Fabric With Mod Podge
Cut the fabric into pieces that fit each tile, leaving a little extra on the edges. Brush a layer of Mod Podge onto the tile, then carefully press the fabric down.
Smooth out wrinkles using a plastic card or your fingers. Apply another layer of Mod Podge over the fabric to seal it. Let it dry completely before using the kitchen surface.
Maintaining Your Fabric-covered Tiles
Once dry, your tiles are sealed but still need gentle care. Use a damp cloth for cleaning instead of harsh chemicals or abrasive scrubbers. This will keep the fabric looking fresh and prevent peeling.
Think about how often you cook or use water near these tiles to decide if this technique fits your lifestyle. Would you be comfortable doing occasional touch-ups to maintain the look?
Cover With Vinyl Flooring
Covering ugly kitchen tiles with vinyl flooring offers a quick and cost-effective makeover. Vinyl sheets or planks can easily hide old tiles and bring fresh style to the kitchen floor. This option works well for renters or homeowners who want to avoid heavy remodeling.
Vinyl flooring comes in many designs, including wood, stone, and patterns. It is durable, water-resistant, and easy to clean, making it perfect for kitchens. Installation can often be done without professional help, saving money and time.
Preparing The Tile Surface
Clean the tile surface thoroughly before applying vinyl. Remove grease, dirt, and dust to ensure good adhesion. Fix any loose or cracked tiles to create a smooth base. The surface must be dry and flat for the vinyl to lay properly.
Choosing The Right Vinyl Flooring
Select vinyl that suits your kitchen style and traffic level. Thick vinyl with a strong backing lasts longer. Peel-and-stick vinyl planks offer easy installation. Consider colors and patterns that complement your kitchen décor.
Installing Vinyl Over Tiles
- Measure the kitchen floor to buy enough vinyl material.
- Cut vinyl sheets or planks to fit around cabinets and corners.
- Peel off backing and press vinyl firmly onto tiles.
- Use a roller to remove air bubbles and secure adhesion.
- Trim excess vinyl at edges for a clean finish.
Maintaining Vinyl Flooring
Clean vinyl regularly with a damp mop and mild cleaner. Avoid abrasive tools or harsh chemicals that can damage the surface. Use felt pads under furniture to prevent scratches. Check edges for lifting and press down as needed.
Temporary Wallpaper Solutions
Temporary wallpaper solutions offer a quick and simple way to cover ugly kitchen tiles. These wallpapers stick easily to tile surfaces without causing damage. They come in many designs, colors, and textures to fit any kitchen style.
Applying temporary wallpaper can refresh the kitchen’s look without the need for costly renovations. It also allows you to experiment with different patterns and themes. Removing the wallpaper is just as easy, leaving no residue behind.
Choosing The Right Temporary Wallpaper
- Pick wallpaper with strong adhesive for tile surfaces.
- Look for waterproof or moisture-resistant options for kitchen use.
- Select patterns that complement your kitchen’s color scheme.
- Consider textured wallpapers to hide tile imperfections.
Preparing Tiles For Wallpaper Application
- Clean tiles thoroughly to remove grease and dirt.
- Dry the surface completely before applying wallpaper.
- Fill any deep grout lines for a smoother finish.
- Remove loose or cracked tiles if possible.
Applying Temporary Wallpaper On Tiles
- Measure the tile area and cut wallpaper accordingly.
- Peel the backing paper slowly while sticking wallpaper.
- Use a squeegee to smooth out air bubbles.
- Trim excess wallpaper around edges with a sharp blade.
Maintaining Temporary Wallpaper In The Kitchen
- Wipe gently with a damp cloth to clean.
- Avoid abrasive cleaners that can damage the wallpaper.
- Check edges regularly and press them down if lifting.
- Replace wallpaper as needed to keep the kitchen fresh.
Frequently Asked Questions
How Can I Cover Ugly Kitchen Tiles Cheaply?
You can use peel-and-stick tiles or tile paint for an affordable makeover. Both options are easy to apply and budget-friendly. They provide a fresh look without removing old tiles. These methods save time and money while improving your kitchen’s appearance.
What Materials Work Best To Cover Old Kitchen Tiles?
Peel-and-stick tiles, tile paint, beadboard panels, and wallpaper are top choices. They are durable, easy to install, and affordable. Each material offers a unique style to refresh your kitchen. Choose based on your budget and design preference.
Is It Possible To Cover Kitchen Tiles Without Removing Them?
Yes, you can cover tiles using adhesive products like peel-and-stick tiles or tile paint. These options avoid the mess and cost of tile removal. They create a smooth, updated surface quickly and effectively. Preparation includes cleaning tiles for better adhesion.
How Long Does It Take To Cover Ugly Kitchen Tiles?
Typically, covering kitchen tiles with paint or peel-and-stick tiles takes 1 to 3 days. Drying and curing times vary by product. Planning for prep work and multiple coats ensures a long-lasting finish. Most DIY projects fit within a weekend.
Conclusion
Ugly kitchen tiles do not have to stay ugly. Simple changes can make a big difference. Covering tiles with paint, stickers, or panels can refresh your space. These ideas save money and time. Your kitchen will feel brighter and cleaner.
You can enjoy cooking in a nicer room. Try one of these easy fixes today. A fresh look is within your reach.

Sophie Hartwell is the founder of KitchenQuik.com, where she shares kitchen tips, smart cooking hacks, and the best product picks to make everyday cooking easier and more enjoyable.