
Are you tired of cluttered kitchen counters and messy soap bottles? Attaching a soap dispenser directly to your kitchen counter can keep your space neat and make washing up faster and easier.
But if you’ve never done it before, the idea might feel a bit tricky. Don’t worry—you’re about to learn a simple, step-by-step way to install your soap dispenser securely, without any hassle. Keep reading, and you’ll discover how to transform your kitchen into a cleaner, more organized space in no time.
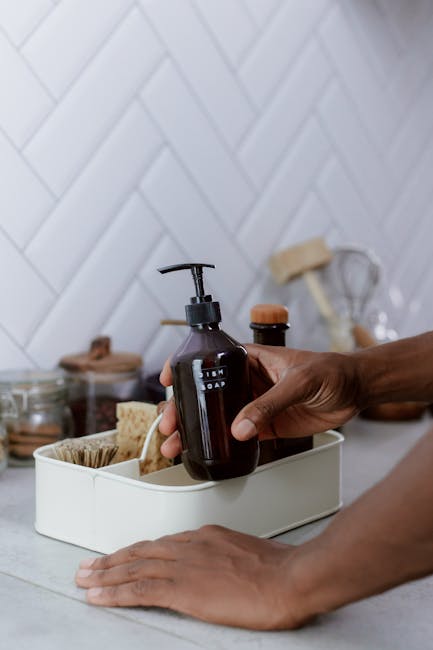
Choose The Right Soap Dispenser
Choosing the right soap dispenser is crucial before you attach it to your kitchen counter. It’s not just about style; the dispenser needs to fit your space and your daily routine. Picking the wrong one can lead to frustration, leaks, or even damage to your countertop.
Types Of Soap Dispensers
There are several types of soap dispensers to consider. Built-in dispensers are installed directly into the counter, giving a sleek and tidy look. Pump dispensers sit on the counter and are easy to move or replace.
Touchless dispensers use sensors to release soap without contact, which is great for hygiene. Manual pump dispensers are the most common and usually the easiest to install. Think about how you use your kitchen and which type fits your lifestyle best.
Material And Size Considerations
The material of your soap dispenser affects both durability and style. Stainless steel dispensers resist rust and look modern, while plastic options are lightweight and budget-friendly. Glass dispensers can add a stylish touch but may be more fragile.
Size matters, too. Check the soap reservoir capacity to avoid constant refills. Also, measure the hole in your countertop or the available space if installing a built-in dispenser. Would a large dispenser clutter your counter or fit perfectly beside your sink?
Select The Installation Spot
Choosing the right spot to attach your soap dispenser is more important than you might think. It affects how convenient it is to use and how well it fits with your kitchen setup. Taking time to carefully select the installation spot can save you hassle and improve your daily routine.
Ideal Locations On Kitchen Counter
Look for a spot close to the sink but not directly in the way of your main workspace. Common places include next to the faucet or near the corner of the counter where you wash dishes. Avoid areas where water splashes frequently to keep the dispenser clean and functional longer.
Think about how you use your sink. If you often wash hands and dishes at different times, placing the dispenser where both activities are easy is key. Have you noticed any spots that slow you down or feel awkward? Those are the ones to avoid.
Measuring Space And Clearance
Before drilling or mounting, measure the available space carefully. Your soap dispenser needs enough room not just for installation, but also for easy refilling and comfortable use. Check the height clearance under the counter if the dispenser has a built-in reservoir below.
Don’t forget to leave clearance for the dispenser’s pump handle to move freely without hitting the backsplash or other objects. A tight spot might look neat but can cause frustration every time you try to use it. What’s the point of a soap dispenser if it slows you down?
Prepare The Counter Surface
Preparing the counter surface is a crucial step before attaching your soap dispenser. A clean, well-marked area ensures the dispenser sits securely and looks neat. Skipping this can lead to poor installation and even damage to your countertop.
Cleaning The Area
Start by clearing the spot where you’ll install the dispenser. Remove any debris, dust, or grease using a mild cleaner and a soft cloth. A clean surface helps the dispenser adhere better and prevents any dirt from interfering with the installation.
Take a moment to inspect the counter for cracks or damage. Installing on a compromised surface can cause leaks or instability later on. Have you noticed any worn spots or stains that might affect the soap dispenser’s hold?
Marking Drill Points
Next, precisely mark where you’ll drill holes for the dispenser. Use a pencil to make small, clear marks on the counter. Double-check measurements to ensure the dispenser aligns with your sink and is easy to reach.
Consider the dispenser’s base size and the tubing underneath the counter. You don’t want to drill too close to cabinet edges or plumbing pipes. Have you measured the depth under your countertop to avoid accidental damage?
Marking accurately saves time and prevents unnecessary holes. If you’re unsure, use painter’s tape to outline the area before marking, which makes adjustments easier. How confident are you with your measuring tools—are they ready for precise marking?
Drill The Installation Hole
Drilling the installation hole is a crucial part of attaching a soap dispenser to your kitchen counter. This step requires precision to ensure a perfect fit and a secure hold. Properly drilling the hole helps avoid damage to your countertop and makes the installation process smooth. Before you start, prepare your tools and workspace carefully.
Choosing The Right Drill Bit
Select a drill bit that matches the size of the soap dispenser’s mounting hole. Usually, a hole saw or spade bit works best for kitchen counters. Check the dispenser’s instructions for the exact diameter needed.
- Use a bit made for the countertop material (e.g., wood, granite, or laminate).
- A carbide-tipped bit works well for hard surfaces like granite or stone.
- For wood counters, standard wood drill bits are suitable.
- Measure twice to avoid drilling a hole that is too big or too small.
Safety Tips For Drilling
Safety is key when drilling into your kitchen counter. Protect yourself and your workspace to prevent accidents and damage.
- Wear safety goggles to protect your eyes from dust and debris.
- Use a mask if the material creates fine dust particles.
- Clamp the counter or workpiece to keep it steady during drilling.
- Start drilling slowly to avoid cracking or chipping the surface.
- Keep your hands clear of the drill bit at all times.
Attach The Soap Dispenser
Drill a hole in the counter near the sink. Insert the soap dispenser pump through the hole. Secure the dispenser bottle underneath.
Attaching a soap dispenser to your kitchen counter might seem like a daunting task at first glance, but it can be a straightforward project that adds both functionality and style to your kitchen. Whether you’re tired of the clutter that comes with various soap bottles or you simply want to streamline your kitchen sink area, installing a soap dispenser is a great solution. The process involves a few simple steps that anyone can follow with ease. Ready to tackle this project? Let’s dive into the details.Inserting The Dispenser Pump
Start by assembling the pump mechanism. Most soap dispensers come with a pump and a straw-like tube. Attach these two parts together securely. Next, insert the pump into the hole you’ve pre-drilled in your countertop. Ensure it’s snugly fitted, as this will prevent any wobble or leaks. Check the alignment. Is the pump facing the right direction for easy access? Adjust if necessary. A slight twist might be all you need for perfection.Securing The Dispenser From Below
Now, get under the sink to secure the dispenser. You’ll find a nut or a mounting bracket that needs to be tightened against the underside of the counter. Use your hands to twist the nut initially. Switch to a wrench for a firmer grip and ensure it’s tightly fastened. Double-check for any movement. Gently wiggle the dispenser from above. If it’s stable, you’ve done a fantastic job. If not, tighten the nut a bit more. Consider adding a small washer if there’s still play. It can offer extra stability and ensure longevity. Does it feel satisfying to complete a DIY project? You’ve not just enhanced your kitchen’s aesthetics but also its convenience.Fill And Test The Dispenser
Filling and testing your soap dispenser is a key step after installation. This ensures the dispenser works correctly and avoids mess. A properly filled dispenser gives smooth soap flow each time. Testing helps find leaks or clogs early.
Adding Soap
Open the dispenser pump by twisting or pulling it gently. Pour liquid soap into the reservoir slowly to avoid spills. Use a funnel for neat filling if needed. Fill the reservoir up to the indicated level or about three-quarters full. Close the pump tightly to prevent leaks.
Checking For Leaks And Functionality
Press the pump several times to prime the dispenser. Watch for soap flow from the nozzle with each press. Check around the base and under the counter for any drips or leaks. Ensure the soap dispenses smoothly without sticking or clogging. Tighten the pump or bottle if you notice leaks. Repeat the pump action until soap flows easily.
Maintenance Tips
Maintaining your soap dispenser is essential for smooth operation and long-lasting use. Clean and refill it regularly to avoid buildup and clogs. Simple care keeps your kitchen counter neat and functional.
Regular Cleaning
Wipe the dispenser surface with a damp cloth to remove dirt and soap residue. Clean the pump nozzle to stop soap from drying and blocking the opening. Use warm water and mild soap for a thorough clean. Avoid harsh chemicals that can damage the dispenser finish.
Refilling And Preventing Clogs
Refill the soap before it runs completely dry. This prevents air from entering the pump and causing clogs. Use liquid soap designed for dispensers to ensure smooth flow. Flush the pump with warm water occasionally to clear any blockages. Keep the refill bottle clean to avoid dirt mixing with the soap.
Frequently Asked Questions
How Do I Install A Soap Dispenser On A Kitchen Counter?
First, drill a hole in the counter. Insert the dispenser pump through it. Secure the dispenser underneath with a mounting nut. Attach the soap bottle and tighten. Ensure the pump operates smoothly before use.
What Tools Are Needed To Attach A Soap Dispenser?
You need a drill, drill bit, screwdriver, and adjustable wrench. Also, have a measuring tape and pencil for marking. These tools help create a hole and secure the dispenser firmly.
Can I Install A Soap Dispenser Without Drilling?
Yes, you can use adhesive mounts or suction cups. However, these may not be as secure or durable as drilled installations. Drilling ensures a stable, long-lasting attachment on your kitchen counter.
How To Choose The Right Hole Size For Installation?
Check the soap dispenser’s installation guide for hole diameter. Typically, 1 to 1. 5 inches is standard. Use the correct drill bit size to avoid loose or tight fitting.
Conclusion
Attaching a soap dispenser to your kitchen counter is simple and quick. Just follow the steps carefully, and you will have it ready in minutes. This small addition keeps your kitchen neat and your soap easy to reach. It also saves space around the sink.
With a few basic tools, anyone can do this job. Try it yourself to enjoy a cleaner and more organized kitchen every day.

Sophie Hartwell is the founder of KitchenQuik.com, where she shares kitchen tips, smart cooking hacks, and the best product picks to make everyday cooking easier and more enjoyable.


