Are you tired of using harsh chemicals to clean your kitchen floor? What if you could make your own soap that’s safe, effective, and gentle on your surfaces?
Creating soap to wash your kitchen floor is easier than you think, and it gives you full control over what goes into your cleaning products. You’ll discover simple steps to make your own soap that leaves your floor sparkling clean without harmful residues.
Keep reading, and you’ll find out how to transform your cleaning routine with a homemade solution that works wonders.
Benefits Of Homemade Soap
Making your own soap to wash the kitchen floor offers many benefits beyond just cleanliness. Homemade soap allows you to control the ingredients, ensuring a safer and more natural cleaning solution. This means fewer harsh chemicals around your home, which can be better for your health and the environment.
Plus, creating soap at home can be cost-effective and customizable to your preferences. You get to choose scents, textures, and even add natural antibacterial agents like essential oils. How often do you get to tailor a product exactly to your needs?
Control Over Ingredients
When you make soap yourself, you decide exactly what goes in it. You avoid harsh chemicals found in many store-bought cleaners, which can irritate skin or cause allergies. Using natural ingredients like olive oil or coconut oil keeps the soap gentle and safe for your family and pets.
Cost Savings
Homemade soap can save you money in the long run. Basic ingredients like lye, oils, and water are inexpensive and last a long time. Instead of buying multiple cleaning products, one batch of soap can handle various cleaning tasks around the house.
Environmental Benefits
Making soap at home helps reduce plastic waste since you control packaging choices. Many store-bought soaps come in plastic bottles that end up in landfills. By using reusable containers or bar soap forms, you contribute less to pollution.
Customization And Scent
You can add your favorite essential oils to homemade soap to create a pleasant aroma while cleaning. This is a great way to avoid synthetic fragrances that often come with chemical additives. Imagine your kitchen floor smelling fresh with natural lemon or eucalyptus scents after every wash.
Effectiveness For Kitchen Floors
Homemade soap is tough on grease and grime, common problems on kitchen floors. Ingredients like castile soap cut through dirt without leaving residues. Have you noticed how some commercial cleaners leave sticky films? Your homemade soap won’t.
Essential Ingredients
Choosing the right ingredients is key to making soap that effectively cleans your kitchen floor without leaving a residue or damaging the surface. You want a mix that not only removes dirt but also tackles grease and grime commonly found in kitchens. The ingredients should be gentle on your floor but tough on messes.
Soap BaseThe soap base forms the foundation of your kitchen floor cleaner. You can use castile soap, which is vegetable-based and biodegradable. It cleans well without harsh chemicals, making it safe for most floor types.
Liquid castile soap is easy to mix and dilutes well in water, providing a balanced cleaning solution. Avoid soap bases with added moisturizers or fragrances that might leave a slippery film on your floor.
WaterWater acts as a solvent to blend all ingredients and helps in spreading the soap evenly across the floor. Use warm water to dissolve the soap base quickly and activate its cleaning power.
Filtered or distilled water can improve the final product, especially if your tap water is hard or contains minerals that could leave deposits.
Natural DegreasersKitchen floors often have stubborn grease that a plain soap might not remove efficiently. Adding natural degreasers like white vinegar or lemon juice helps break down oily residues.
Both vinegar and lemon juice are safe, inexpensive, and leave a fresh scent behind. However, test these on a small floor area first, as acidic ingredients can affect certain flooring materials.
Essential Oils for FreshnessAdding a few drops of essential oils like tea tree, eucalyptus, or lavender can enhance the cleaning power and leave your kitchen smelling clean and inviting. Tea tree oil also has natural antibacterial properties.
Be cautious not to add too much, as concentrated oils can irritate skin or damage certain floor finishes. A few drops are enough to lift the scent and boost cleaning.
Optional Additives for Extra Cleaning- Baking Soda:Acts as a mild abrasive and deodorizer. Great for tackling tough stains.
- Salt:Can help scrub and brighten floors without scratching.
These additives are useful but should be used sparingly to avoid dulling or scratching your floor’s surface. Think about what your floor needs most before adding extra ingredients.
Tools And Equipment Needed
Creating soap to wash your kitchen floor needs some basic tools and equipment. Having the right items makes the process easier and cleaner. These tools help mix, measure, and store the soap safely. You do not need many things, just a few simple ones.
Measuring Cups And Spoons
Accurate measurement is key for good soap. Use measuring cups and spoons to get the right amounts. Plastic or metal ones work well and are easy to clean.
Mixing Bowls
Mixing bowls help combine all ingredients smoothly. Choose bowls made from glass or stainless steel. These materials do not react with soap ingredients.
Stirring Utensils
Stir the ingredients with a spoon or spatula. Use something sturdy and easy to hold. Wooden or silicone utensils work best for mixing soap.
Protective Gear
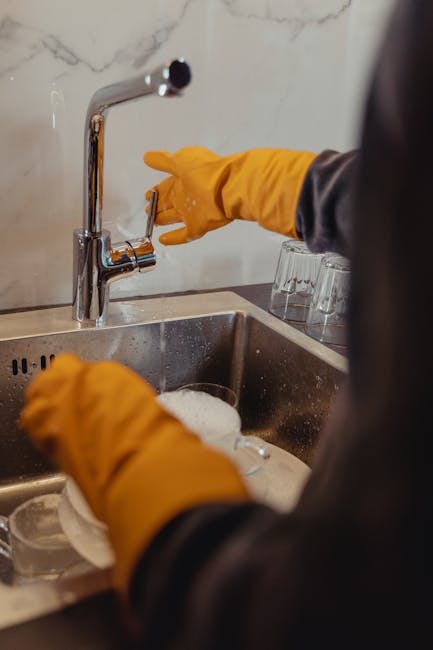
Wear gloves and safety glasses to protect skin and eyes. Soap ingredients can irritate, so safety is important. Use rubber gloves and clear safety goggles.
Storage Containers
Store your homemade soap in clean, airtight containers. Use plastic bottles or jars with lids. Proper storage keeps soap fresh and ready for use.
Safety Precautions
Safety should be your top priority when creating soap for washing your kitchen floor. Handling ingredients without care can cause skin irritation or accidental spills that make cleaning harder. Being mindful of safety steps protects you and ensures your homemade soap works effectively without any unwanted side effects.
Wear Protective Gear
Always wear gloves to protect your skin from harsh chemicals like lye or essential oils. Safety goggles help prevent splashes from reaching your eyes, especially when mixing ingredients. I once skipped gloves and ended up with red, itchy skin that took days to heal—don’t make the same mistake.
Work In A Well-ventilated Area
Mixing soap ingredients can release strong fumes. Open windows or use a fan to keep fresh air flowing. This simple step reduces the risk of dizziness or headaches while you work.
Measure Ingredients Accurately
Using the wrong amount of lye or oils can cause dangerous chemical reactions or make the soap ineffective. Use a digital scale for precise measurements every time you create your kitchen floor soap.
Store Ingredients Safely
Keep all soap-making ingredients out of reach of children and pets. Label containers clearly and store them in a cool, dry place to prevent accidental spills or contamination.
Handle Lye With Care
Lye is a powerful chemical that requires careful handling. Add lye to water slowly, never the other way around, to avoid splashing. If you spill lye, clean it immediately with plenty of water to prevent damage or injury.
Test Soap Before Use
Always test a small patch of your floor with the soap before applying it everywhere. This helps you check for any slippery residue or surface damage. Have you ever cleaned your floor only to find it sticky or dull afterward? Testing can save you that trouble.
Step-by-step Soap Making Process
Creating soap to wash your kitchen floor is simple and rewarding. Follow this step-by-step soap making process for best results. This guide helps you make safe, effective soap at home. Each step is clear and easy to follow.
Measuring And Preparing Ingredients
Start by gathering all ingredients: soap base, water, and additives. Measure each ingredient carefully using a kitchen scale or measuring cups. Precision ensures the soap works well and lasts longer. Prepare your workspace by cleaning surfaces and gathering tools like bowls and spoons.
Mixing The Soap Base
Cut the soap base into small cubes for easy melting. Heat it slowly in a microwave or double boiler until fully melted. Stir gently to remove lumps and create a smooth mixture. Avoid overheating to keep the soap’s quality intact.
Adding Scents And Colors
Add a few drops of essential oils to give a fresh scent. Choose mild, natural oils to avoid irritation. Mix in colorants if you want a tinted soap. Use small amounts to keep colors soft and natural. Stir well to blend scents and colors evenly.
Pouring And Setting
Pour the soap mixture into molds or containers. Use silicone molds for easy removal after setting. Let the soap cool and harden at room temperature for several hours. Once solid, remove the soap from molds. Store it in a dry place until ready to use.
Using The Soap On Kitchen Floors
Using the soap you’ve made to clean your kitchen floors is where your effort truly pays off. Applying it correctly not only ensures a spotless floor but also protects the surface and keeps your kitchen smelling fresh. How you prepare and apply the soap solution can make a big difference in the results you get.
Diluting The Soap Solution
Always dilute your soap before using it on the kitchen floor. Concentrated soap can leave a sticky residue that attracts dirt quickly.
A good rule of thumb is to mix about 1 to 2 tablespoons of your homemade soap into a bucket of warm water (around 1 gallon). Adjust the amount depending on how dirty your floor is and the strength of your soap.
If you notice any slippery spots after mopping, try adding less soap next time or rinsing the floor with clean water afterward. Have you ever experienced floors that felt slick after cleaning? Proper dilution helps avoid that problem entirely.
Application Techniques
Use a mop or a soft cloth to apply the diluted soap solution evenly across the floor. Avoid soaking the floor too much, as excess water can damage certain flooring types like wood or laminate.
- Start from the farthest corner of your kitchen and work your way toward the exit to avoid stepping on wet floors.
- Use gentle, circular motions to lift dirt without scratching the floor surface.
- Rinse your mop frequently to prevent spreading dirt around.
After mopping, allow the floor to air dry or wipe it with a dry cloth if you want to speed up the process. Notice how your kitchen feels afterward; a clean floor should look shiny but never feel sticky or slippery.
Tips For Storage And Longevity
Proper storage extends the life of homemade soap for washing kitchen floors. It keeps the soap effective and fresh. Storing soap correctly prevents it from melting or becoming too hard.
Simple steps can help keep your soap in good condition. These tips make sure your soap stays ready for use whenever you need it.
Store Soap In A Cool, Dry Place
Heat and moisture can soften or melt soap quickly. Choose a spot away from direct sunlight and heat sources. A cool, dry cabinet or shelf works well.
Use Airtight Containers
Airtight containers stop moisture and air from reaching the soap. This keeps the soap firm and stops it from drying out or cracking. Glass jars or plastic boxes with tight lids are good options.
Keep Soap Away From Water
Water can cause soap to dissolve or become slimy. Avoid placing soap near sinks or wet surfaces. Let the soap dry completely before storing it.
Cut Soap Into Small Bars
Smaller bars dry faster and last longer. They also make it easy to use only what you need each time. This reduces waste and keeps the rest of the soap fresh.
Label Soap With Date
Write the date when you made the soap on the container. This helps track how long the soap has been stored. Use the oldest soap first to keep everything fresh.
Troubleshooting Common Issues
Creating your own soap to wash the kitchen floor can be rewarding, but it’s not always smooth sailing. You might face some common problems that can affect your soap’s effectiveness or ease of use. Understanding these issues and how to fix them will save you time and frustration.
Soap Not Lathering Well
If your soap doesn’t produce enough bubbles, it might feel like it’s not cleaning properly. This often happens if you use too much oil or don’t add enough water during the mixing process.
Try adjusting the water-to-oil ratio slightly. Adding a bit more water or reducing oils like coconut or olive oil can improve lather. Also, make sure you mix the ingredients thoroughly to activate the soap properly.
Soap Is Too Sticky Or Soft
Sticky soap can make cleaning messy and difficult. This usually happens if the soap hasn’t cured long enough or if the recipe has too much oil without enough lye to balance it.
Give your soap more time to dry and harden before use. If you notice the problem early, try tweaking the lye amount carefully next time to match the oils. You can also store the soap in a dry, ventilated place to speed up curing.
Unpleasant Smell In The Soap
A strong or sour odor can be off-putting and might mean your soap has gone bad or the ingredients weren’t balanced well. Sometimes using rancid oils or improper storage causes this.
Always use fresh, high-quality oils and store your soap away from heat and sunlight. Adding natural essential oils like lemon or eucalyptus can also mask mild unwanted smells while giving a fresh scent.
Soap Leaves A Residue On The Floor
If your floor feels sticky or slippery after washing, residue might be left behind. This can happen if too much soap is used or if it isn’t rinsed off properly.
Use less soap in your cleaning solution and rinse with clean water after washing. Testing small areas first helps you find the right balance for your kitchen floor. Have you noticed residue after washing before? Try cleaning with water only afterward to see the difference.
Frequently Asked Questions
How Do I Make Soap For Washing Kitchen Floors?
To make kitchen floor soap, mix water, natural soap flakes, and essential oils. Heat gently until dissolved. Cool before use for effective cleaning.
What Ingredients Are Best For Homemade Kitchen Floor Soap?
Use natural soap flakes, warm water, vinegar, and lemon or tea tree oil. These ingredients clean and disinfect kitchen floors safely.
Can Homemade Soap Remove Grease From Kitchen Floors?
Yes, homemade soap with natural soap flakes and vinegar effectively cuts through grease. Essential oils add antibacterial properties and fresh scent.
How Much Soap Should I Use Per Cleaning Session?
Use about 1/4 cup of homemade soap per gallon of warm water. This ratio cleans well without leaving residue on floors.
Conclusion
Creating your own soap to clean the kitchen floor is simple and effective. This soap helps remove dirt and grease without harsh chemicals. You save money and control the ingredients. Plus, it is gentle on your floors and the environment.
Try making this soap at home for a fresh, clean kitchen floor. Small steps like this make a big difference in daily cleaning. Start today and enjoy a cleaner, safer kitchen space.

Sophie Hartwell is the founder of KitchenQuik.com, where she shares kitchen tips, smart cooking hacks, and the best product picks to make everyday cooking easier and more enjoyable.
