If you’ve ever struggled with peeling hard boiled eggs or ended up with that green ring around the yolk, you’re not alone. Getting the perfect hard boiled egg might seem simple, but there’s a science behind it—one that America’s Test Kitchen has mastered.
You’ll discover their foolproof method to cook eggs just right every time. Imagine peeling your eggs effortlessly and enjoying a creamy, perfectly cooked yolk without any guesswork. Keep reading, and you’ll never look at hard boiled eggs the same way again.
Choosing The Right Eggs
Choosing the right eggs is key to perfect hard-boiled eggs. Egg quality affects texture, taste, and peeling ease. Not all eggs perform the same in boiling. Knowing which eggs to pick helps avoid common cooking problems.
Freshness And Age
Older eggs peel easier after boiling. Fresh eggs have tight membranes that stick to the shell. Eggs stored for about 7 to 10 days work best. They are still safe to eat but easier to peel. Store eggs in the fridge for consistent results. Label eggs with purchase date to track age.
Egg Size And Type
Choose large eggs for standard recipes. Size affects cooking time slightly. Brown and white eggs boil the same way. Shell color does not impact taste or cooking. Organic or free-range eggs may offer richer flavor. Use what fits your budget and preference.
Preparing Eggs For Boiling
Preparing your eggs properly before boiling makes a huge difference in the final result. It helps prevent cracking and uneven cooking, which can ruin the perfect hard-boiled egg you’re aiming for. Small steps like bringing eggs to room temperature and pricking the shell set you up for success right from the start.
Bringing Eggs To Room Temperature
Cold eggs straight from the fridge can crack when placed in hot water due to the sudden temperature change. Letting your eggs sit out for about 20-30 minutes allows them to warm up gradually. This simple step helps the eggs cook evenly and reduces the chance of shell breakage.
Have you ever noticed a cracked egg in your pot? The shock from cold to hot water is often the culprit. Taking a few extra minutes to bring your eggs to room temperature saves you from that frustration.
Pricking The Shell
Pricking a tiny hole in the wider end of the egg shell lets air escape during boiling. This prevents the shell from cracking and also makes peeling easier later on. Use a pin or a specialized egg pricker for this task—gently and carefully.
It might seem like a small detail, but pricking the shell can change your boiling experience completely. Next time, try this trick and see how much smoother peeling becomes. Isn’t it satisfying when the shell just slips off effortlessly?
Boiling Techniques
Boiling eggs is a simple task. Yet, achieving the perfect texture can be tricky. America’s Test Kitchen provides trusted methods. Let’s explore two techniques for the best results.
Cold Water Start Method
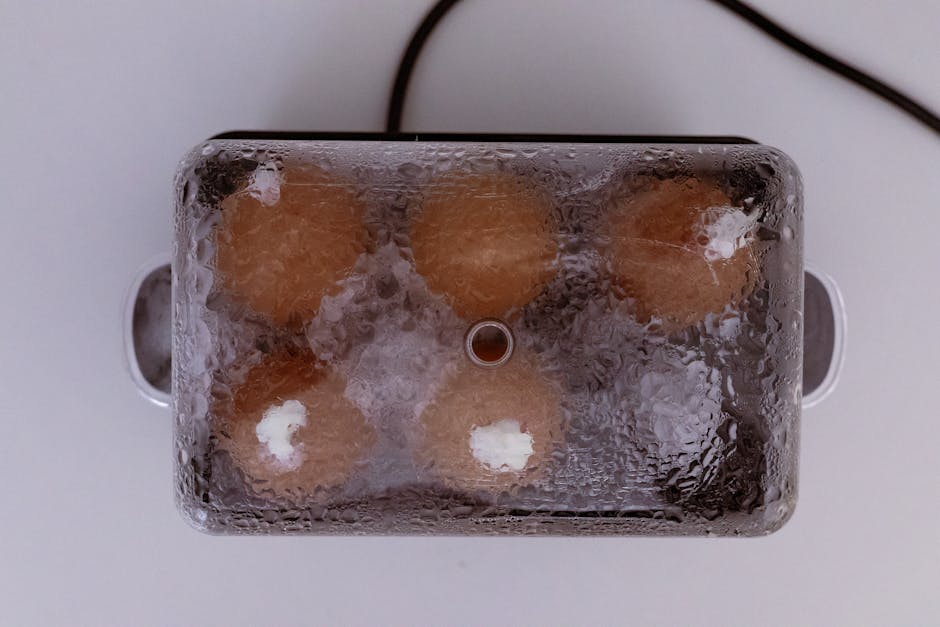
This method involves starting with cold water. Place eggs in a pot. Cover them with cold water. Bring the water to a gentle boil. Once boiling, turn off the heat. Cover the pot with a lid. Let the eggs sit for about 10 minutes. The gradual heat cooks the eggs evenly.
Hot Water Start Method
This technique begins with boiling water. Boil water in a pot first. Then, gently add the eggs. Cook the eggs for 9 to 12 minutes. The time depends on desired firmness. This method seals the egg whites quickly. It reduces the risk of overcooking. It’s a faster process.
Timing For Perfect Yolks
Timing is the key to achieving the perfect yolk in hard boiled eggs. A few seconds too long or too short can change the texture completely. Understanding the exact timing helps you get the yolk just the way you like it—whether soft, creamy, or fully firm.
Soft, Medium, And Hard Boiled Timings
Your ideal yolk texture depends on how long you cook your eggs. Here’s a simple guide based on America’s Test Kitchen recommendations:
| Yolk Type | Cooking Time (after water boils) | Yolk Texture |
|---|---|---|
| Soft Boiled | 4 to 5 minutes | Runny and bright yellow |
| Medium Boiled | 7 to 8 minutes | Creamy and slightly jammy |
| Hard Boiled | 11 to 12 minutes | Fully set and crumbly |
Have you ever ended up with a gray-green ring around the yolk? That usually means the egg was overcooked. Sticking to these times keeps your yolks perfectly colored and textured.
Adjusting For Altitude And Egg Size
Altitude changes the boiling point of water, which affects cooking time. At higher elevations, water boils at a lower temperature, so eggs need a bit more time to cook through.
Egg size also matters. Larger eggs require slightly longer cooking to reach the same yolk consistency. If you use extra-large or jumbo eggs, add about 30 seconds to 1 minute to the times listed above.
Next time you boil eggs, note your altitude and egg size. Adjust your timing accordingly and see how much difference it makes. Have you tracked these small changes in your kitchen before? They can transform an average boiled egg into a perfectly tailored one.
Cooling And Peeling Tips
Cooling and peeling hard-boiled eggs can make or break your cooking experience. Getting this right means less frustration and more perfectly peeled eggs ready for your favorite recipes. Here’s how you can make the process smoother and quicker.
Ice Bath Benefits
Plunging your eggs into an ice bath immediately after boiling stops the cooking process. This prevents the yolks from turning greenish and keeps the texture just right.
The cold water also helps shrink the egg inside the shell, creating a gap that makes peeling easier. I once skipped this step and ended up with stubborn shells sticking to my eggs—definitely not fun!
Try to leave the eggs in the ice bath for at least 5 minutes. You’ll notice the shells come off with much less effort.
Easy Shell Removal Tricks
Peeling can be tricky, but a few tricks can save your eggs from a rough peel. Start by gently tapping the egg on a hard surface to crack the shell all over.
Rolling the egg under your palm helps loosen the shell further. Then, peel from the wider end where the air pocket is usually located—this gives you a natural starting point.
- Peel under running water to wash away tiny shell fragments.
- Use a spoon to slide between the shell and egg for a smooth peel.
- Consider adding a teaspoon of baking soda to the boiling water to make shells easier to remove.
Have you ever noticed how some eggs peel like a dream and others stick stubbornly? These tips can help you get closer to perfect every time.
Common Mistakes To Avoid
Mastering the art of hard boiling eggs is simpler when you know what pitfalls to avoid. Common mistakes can turn a perfect batch into a disappointing one. Understanding these errors helps you achieve consistent, delicious results every time.
Overcooking And Green Yolks
Overcooking eggs causes the yolks to develop a greenish-gray ring. This happens because the iron in the yolk reacts with sulfur in the white when exposed to high heat for too long.
To prevent this, time your boiling carefully. For example, once the water reaches a gentle boil, reduce the heat and start your timer for about 9-12 minutes. Quick cooling in ice water stops the cooking process and keeps yolks bright and tender.
Have you ever bitten into a hard-boiled egg only to find a chalky texture and off-putting color? That’s usually overcooking at play, and it’s easy to fix with proper timing and cooling.
Cracking During Boil
Cracked eggs are a common frustration. Cracks allow water to seep in, leading to uneven cooking and messy whites.
Try starting your eggs in cold water and bring it slowly to a boil. This gradual temperature change reduces shock to the shell. Also, avoid crowding the pot—eggs need space to move gently.
Adding a pinch of salt or a splash of vinegar to the water can help seal minor cracks and prevent whites from leaking out. Have you noticed how a sudden temperature change can cause eggs to crack? Managing heat carefully can save your batch.
Storing Hard Boiled Eggs
Proper storage of hard boiled eggs is essential to keep them fresh and safe. After cooking, eggs need quick cooling to stop bacteria growth. Storing them correctly also helps keep their texture and taste.
Refrigeration Guidelines
Place hard boiled eggs in the refrigerator within two hours of cooking. Keep them in a clean container or egg carton. Do not peel eggs before storing to prevent drying out. Store eggs at a temperature below 40°F (4°C). Avoid keeping eggs in the refrigerator door because of temperature changes.
Shelf Life And Safety
Hard boiled eggs last about one week in the refrigerator. Check for unusual smells or slimy texture before eating. Discard any eggs that look or smell bad. Label the storage container with the cooking date for easy tracking. Eating eggs past one week can cause foodborne illness risks.
Creative Uses For Hard Boiled Eggs
Hard boiled eggs are more than just a simple snack or breakfast staple. Once you master the perfect technique with America’s Test Kitchen method, you open the door to a world of creative uses that can make your meals more exciting and nutritious. Whether you want quick snacks or beautiful garnishes, hard boiled eggs add flavor, texture, and protein in surprising ways.
Recipes And Snacks
Think beyond the classic egg salad. Hard boiled eggs can be the star of many easy recipes that you can whip up in minutes. Try slicing them onto avocado toast for a creamy, protein-packed boost that keeps you full longer.
Deviled eggs are another timeless snack, but you can give them a twist by adding flavors like curry powder, smoked paprika, or even wasabi for a spicy kick. You’ll find these small bites perfect for parties or a quick protein hit during the day.
Looking for something portable? Pack whole hard boiled eggs with a pinch of salt or your favorite seasoning in your lunchbox. They’re simple, mess-free, and great on the go.
Garnishing Ideas
Hard boiled eggs can elevate the look and taste of many dishes with minimal effort. Thin slices or wedges make a lovely garnish for salads, adding a creamy contrast to crisp greens and crunchy veggies.
Try grating a hard boiled egg over soups or pasta dishes. It melts slightly into the warm food, creating a subtle richness that’s hard to beat. This technique works especially well on tomato-based or vegetable soups.
Ever tried adding chopped hard boiled eggs to your toast or grain bowls? It’s an easy way to add texture and a protein punch. Sprinkle with fresh herbs like chives or dill, and you have a simple dish that looks as good as it tastes.
Frequently Asked Questions
How Long Should Eggs Boil For Hard Boiling?
Boil eggs for 9 to 12 minutes for perfect hard-boiled results. Timing depends on egg size and altitude. Use a timer to ensure accuracy.
What Is The Best Method To Hard Boil Eggs?
Use the simmer-and-steam method for even cooking and easy peeling. Start eggs in boiling water, then simmer gently for 10 minutes. Cool in ice water immediately.
How Can I Prevent Eggs From Cracking While Boiling?
Add a pinch of salt or vinegar to the water. Start with room temperature eggs and avoid rapid temperature changes. Gentle simmering also helps prevent cracks.
Why Should I Cool Hard-boiled Eggs In Ice Water?
Ice water stops cooking instantly, preventing overcooking and green yolks. It also makes peeling easier by contracting the egg inside the shell.
Conclusion
Hard boiling eggs is simple with America’s Test Kitchen tips. Start with fresh eggs and the right water temperature. Timing is key—set your timer carefully. Cool eggs quickly to stop cooking and peel easily. Practice makes perfect, so try these steps often.
Enjoy your perfectly hard-boiled eggs in salads, snacks, or meals. This method saves time and reduces stress in the kitchen. Give it a shot and taste the difference yourself!

Sophie Hartwell is the founder of KitchenQuik.com, where she shares kitchen tips, smart cooking hacks, and the best product picks to make everyday cooking easier and more enjoyable.


