
Your kitchen sink splash guard might seem like a small detail, but it plays a big role in keeping your sink area clean and dry. Over time, it can collect dirt, grime, and even mold, making your kitchen look less fresh.
If you’ve been wondering how to clean your splash guard quickly and effectively, you’re in the right place. You’ll discover simple steps and easy tips that anyone can follow to restore your splash guard’s shine and keep your kitchen hygienic.
Ready to make your sink area sparkle again? Let’s dive in!
Tools And Materials Needed
Cleaning a kitchen sink splash guard is simple with the right tools and materials. These items help remove dirt and grime efficiently. Having everything ready saves time and effort. You can achieve a clean and fresh splash guard with ease.
Cleaning Agents
- Mild dish soap
- Baking soda
- White vinegar
- Non-abrasive cleaner
Cleaning Tools
- Soft sponge or cloth
- Old toothbrush
- Spray bottle
- Microfiber towel
Protective Gear
- Rubber gloves
- Apron
Additional Supplies
- Bucket or basin
- Warm water
- Paper towels
Preparing The Sink Area
Preparing your sink area before cleaning the kitchen sink splash guard sets the stage for an effective and hassle-free process. Taking a few simple actions can prevent messes, save time, and make the cleaning more thorough. Have you noticed how clutter or leftover food scraps often make cleaning feel like a bigger chore? Clearing these away first can change that.
Clear Out The Sink And Surrounding Area
Start by removing any dishes, utensils, or food debris from the sink and nearby countertops. A clean workspace helps you focus on the splash guard without distractions. It also prevents dirty water or cleaning agents from contaminating your dishes.
Gather Your Cleaning Supplies
Collect all the necessary items before you begin. You might need:
- Mild dish soap
- Soft scrub brush or sponge
- White vinegar or baking soda for tough stains
- A clean cloth or paper towels
- Gloves to protect your hands
Having everything within reach keeps you from interrupting your cleaning flow.
Protect The Surrounding Surfaces
Prevent accidental damage by placing a towel or old cloth around the sink edges. This shields countertops from splashes and protects wooden or delicate surfaces. Have you ever cleaned only to find water spots or scratches afterward? This simple step avoids that problem.
Turn Off Or Cover The Faucet
Make sure the faucet is turned off tightly to avoid drips. If possible, cover it with a plastic bag or wrap to prevent cleaning agents from splattering onto it. This small precaution keeps your faucet looking spotless after you finish.
Removing The Splash Guard
Removing the splash guard from your kitchen sink is a key step before giving it a thorough clean. This part often traps grime and soap residue, which can lead to unpleasant smells and reduce its effectiveness. Taking it off carefully will help you reach every nook and cranny, making your cleaning much more efficient.
Locate The Attachment Points
Start by identifying how the splash guard is attached to your sink. Most guards are either clipped in place, screwed, or sealed with adhesive. Knowing this will help you choose the right approach without causing damage.
Gather Necessary Tools
Before you begin, get a few basic tools handy. A flathead screwdriver, a pair of pliers, and a utility knife often do the trick. Having these ready saves time and prevents frustration during removal.
Gently Detach The Splash Guard
Use the screwdriver or pliers to carefully loosen clips or screws holding the splash guard. If it’s sealed with adhesive, slide the utility knife gently between the guard and sink to break the seal. Take your time to avoid scratching your sink surface.
Clean Around The Edges
Once the splash guard is off, inspect the edges of both the sink and the guard. Wipe away any leftover dirt or old adhesive with a damp cloth or sponge. This makes reinstallation easier and ensures a tight fit.
Store The Splash Guard Safely
Place the removed splash guard on a clean, flat surface while you clean it. This prevents it from getting damaged or misplaced. Keeping track of small screws or clips in a container can save you from a frustrating search later.
Cleaning Techniques For Different Materials
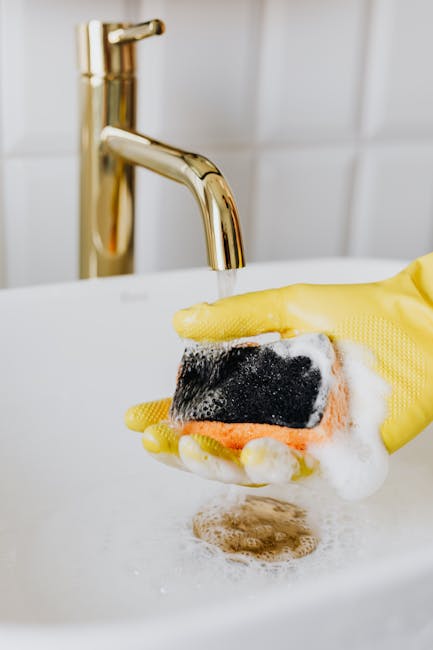
How to Clean Kitchen Sink Splash Guard Rinse the splash guard with warm water. Apply mild dish soap on a sponge. Scrub gently to remove grime. Rinse again to wash away soap. Dry with a clean cloth to prevent water spots.
Regular cleaning keeps your splash guard fresh and hygienic.
Cleaning Techniques for Different Materials Maintaining a sparkling kitchen sink splash guard is essential for both hygiene and aesthetic reasons. The cleaning technique you choose should depend on the material of your splash guard. Let’s dive into some effective cleaning strategies tailored for different materials to ensure your splash guard stays clean and functional.Plastic Splash Guards
Plastic splash guards are popular for their affordability and ease of maintenance. A simple mix of warm water and mild dish soap can work wonders. Use a soft sponge to gently scrub the surface, focusing on any stubborn stains. For deeper cleaning, consider adding a splash of white vinegar to the water. This natural disinfectant can help eliminate bacteria and odors. Remember to thoroughly rinse the plastic with clean water to avoid soap residue.Metal Splash Guards
Metal splash guards, often made of stainless steel, require a bit more attention to prevent rust and water spots. Start by using a non-abrasive cloth dipped in warm soapy water. Gently scrub the surface, ensuring you follow the grain to maintain the metal’s sheen. For tough stains, a paste made from baking soda and water can be applied and left for a few minutes before wiping off. A quick polish with a soft cloth can bring back the metal’s shine. Avoid using bleach or harsh chemicals as they can damage the metal’s surface.Silicone Splash Guards
Silicone splash guards are known for their flexibility and durability. Cleaning them can be a breeze if done correctly. Begin by soaking the silicone in warm, soapy water for a few minutes. Use a soft-bristled brush to gently scrub away any grime. If you notice any lingering stains, a solution of baking soda and water can help lift them off. Rinse thoroughly and allow the silicone to air dry. It’s crucial to dry them completely to prevent mold growth. Do you regularly check for signs of wear and tear on your splash guard? It might be time for a replacement if cleaning doesn’t restore its original look.Dealing With Stubborn Stains
Stubborn stains on your kitchen sink splash guard can be frustrating. They often resist regular cleaning and make your sink area look unkempt. Tackling these tough spots requires a bit more effort and the right approach to restore the guard to its clean state.
Using Baking Soda And Vinegar For Effective Cleaning
Baking soda and vinegar work wonders on stubborn stains. Sprinkle baking soda generously over the splash guard, then spray or pour white vinegar on top. The fizzing reaction helps break down grime and lifts stains effectively.
Let the mixture sit for 10-15 minutes before scrubbing with a soft brush or sponge. Rinse with warm water and check if the stain has faded. Repeat if necessary, but avoid harsh scrubbing that might damage the surface.
Applying A Paste Of Lemon Juice And Salt
Lemon juice’s natural acidity combined with the abrasiveness of salt can tackle persistent stains. Mix lemon juice with enough salt to form a thick paste and apply it directly to the stained areas. Allow it to sit for 20 minutes to penetrate the grime.
Use a damp cloth or sponge to scrub gently, then rinse thoroughly. This method not only cleans but also leaves a fresh scent, making your kitchen feel cleaner and more inviting.
Using A Commercial Stain Remover Safely
If natural remedies don’t do the trick, a commercial stain remover designed for kitchen use can be effective. Choose a product suitable for your splash guard’s material and always read the label before applying. Test on a small, hidden area first to avoid damage.
Apply the stain remover according to instructions, usually letting it sit for a few minutes before wiping away. Remember to wear gloves and ensure proper ventilation in your kitchen to protect yourself from fumes.
Drying And Reinstalling The Splash Guard
After thoroughly cleaning your kitchen sink splash guard, drying it properly is crucial to avoid water spots and mold buildup. Taking the time to dry and reinstall the splash guard carefully can extend its lifespan and keep your sink area looking fresh. Let’s look at how to handle this final step effectively.
Drying The Splash Guard Thoroughly
Use a clean, dry cloth or microfiber towel to wipe down the splash guard immediately after rinsing. Pay attention to corners and edges where water can hide and cause damage over time.
If possible, let it air dry for 10-15 minutes in a well-ventilated area. This extra drying time ensures any trapped moisture evaporates completely before you reinstall it.
Preparing The Sink Area Before Reinstallation
Before placing the splash guard back, wipe the sink edge with a dry cloth to remove any leftover moisture or debris. This prevents water from getting trapped under the guard, which can cause mold or mildew.
Check the seal or adhesive strip on your splash guard for any wear and replace it if necessary. A good seal keeps water contained and protects your cabinets and countertop.
Reinstalling The Splash Guard Securely
Align the splash guard carefully along the sink edge, ensuring it fits snugly without gaps. Press down firmly but gently to secure it in place.
Test the guard by running a small amount of water near it to see if it directs water back into the sink. If you notice leaks or loose spots, adjust the positioning or reinforce the seal.
Maintenance Tips For Longevity
Keeping your kitchen sink splash guard clean extends its life and keeps your sink area hygienic. Regular care prevents stains, mold, and buildup that can damage the guard. Simple habits make a big difference in maintaining this important kitchen part.
Clean Splash Guard Weekly
Wipe the splash guard at least once a week. Use a soft cloth with warm water and mild soap. Avoid harsh chemicals that can wear down the material. Regular cleaning stops dirt and grime from settling in.
Dry After Each Use
Water left on the splash guard can cause mold or mildew. Use a dry towel to wipe off the guard after washing dishes. This keeps moisture from building up and reduces stains.
Check For Damage Regularly
Look closely for cracks or loose edges. Damaged parts let water seep behind the guard and harm your wall. Fix small issues early to avoid costly repairs later.
Avoid Abrasive Tools
Do not scrub with steel wool or rough brushes. These can scratch and damage the splash guard surface. Stick to soft sponges or microfiber cloths to protect the finish.
Use Natural Cleaners
Try vinegar or baking soda for tough stains. They clean well without harsh chemicals. Mix them with water to create a gentle, effective cleaner for your splash guard.
Frequently Asked Questions
How Often Should I Clean My Kitchen Sink Splash Guard?
You should clean the splash guard weekly to prevent grime and mold buildup. Regular cleaning maintains hygiene and keeps your kitchen fresh.
What Materials Are Best For Cleaning Splash Guards?
Use mild dish soap, warm water, and a soft sponge. Avoid harsh chemicals that can damage the splash guard surface.
Can Vinegar Effectively Clean Kitchen Sink Splash Guards?
Yes, vinegar is a natural cleaner that removes stains and disinfects. Mix vinegar with water, apply, and wipe for a sparkling splash guard.
How Do I Prevent Mold On My Sink Splash Guard?
Keep the area dry and clean after use. Regularly wipe down the splash guard and ensure proper kitchen ventilation.
Conclusion
Cleaning your kitchen sink splash guard keeps your sink fresh and neat. Regular scrubbing stops dirt and germs from building up. Use mild soap and a soft cloth to avoid damage. Rinse well to remove all soap residue. Dry the splash guard to prevent water spots.
Small efforts save you from bigger cleaning later. Keep your kitchen healthy and inviting with simple care. Easy steps, great results. Try it today!

Sophie Hartwell is the founder of KitchenQuik.com, where she shares kitchen tips, smart cooking hacks, and the best product picks to make everyday cooking easier and more enjoyable.


